
If you are anything like me you grew up in the Arcades. It may be hard to believe for the younger generation but yes, arcades were popular at one point in time. It was not uncommon for me and my friends to drop $10.00 or more of our allowance each weekend on the monster 4 player arcade machine known as X-Men. Maybe you have dreamed of bringing the arcade to your home only to find it just too expensive to buy one of those machines? Well think again.
(HEY YOU!! We hope you enjoy! We try not to run ads. So basically, this is a very expensive hobby running this site. Please consider joining us for updates, forums, and more. Network w/ us to make some cash or friends while retro gaming, and you can win some free retro games for posting. Okay, carry on 👍)
I have created a guide that covers how I was able to create my own Arcade Machine step by step that plays every single arcade game I could of ever wanted to play growing up, and more. You can do it yourself, and its quite simple. You don’t have to be a master woodworker or computer genius to do so. Just read what I am telling you.
There are a few basic steps to building your own Arcade Machine:
1. The Cabinet and Monitor
2. Your Computer (The guts)
3. Your Control Panel (Tankstick baby)
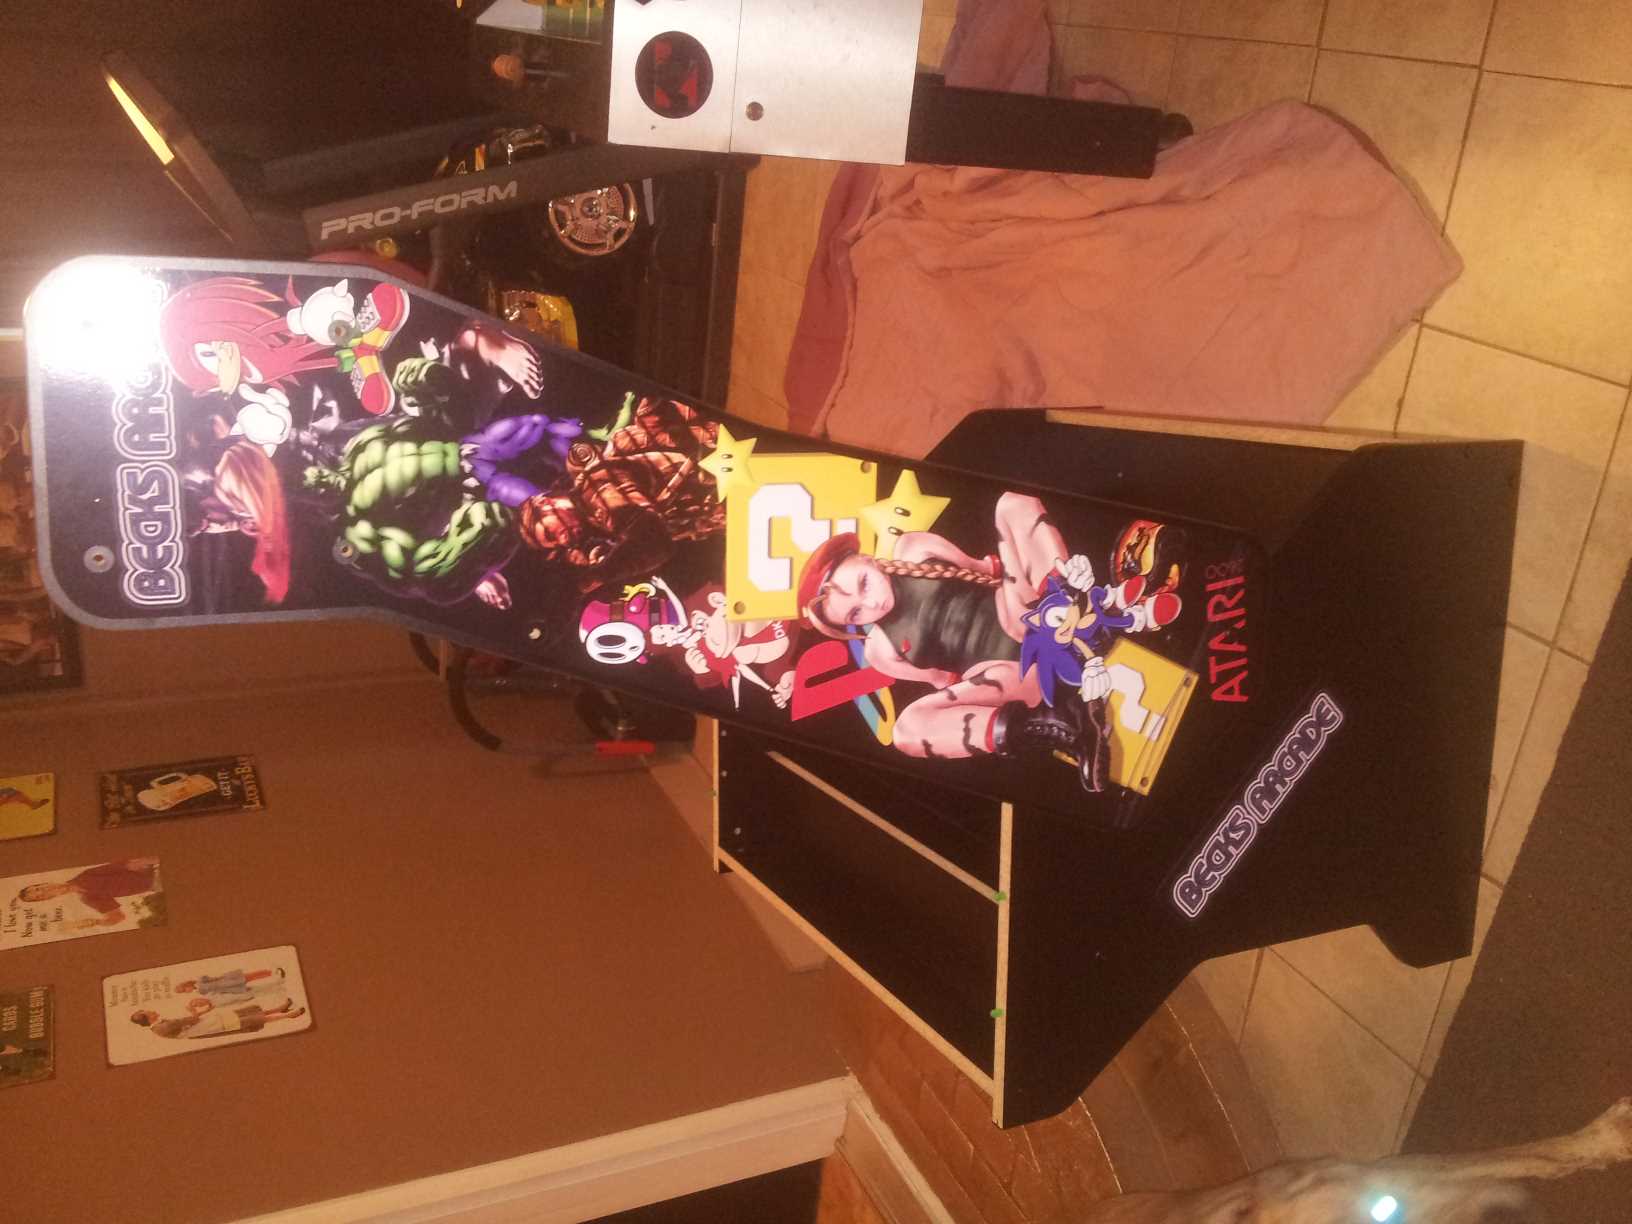
4. The Artwork
5. The Emulators & Roms (The game system and games)
6. Optional but highly recommended (A front end)
After reading this article, If you are interested… I have coupons I can give away (10) first come first serve to receive a discount on the cabinet. Contact me, when they are gone they are truly gone.
The Cabinet
I thought long and hard on this purchase before pulling the trigger. I had several options from locally buying an old cabinet and restoring it, to buying a prebuilt one and having it drop shipped. Also were the options of buying the wood (Flat Pack) in a do it yourself kit form. I decided to purchase the kit as this was my first attempt (and probably not my last) to save some time as this was my first attempt at putting together my own arcade machine.
After weighing out my options and my decision took almost a year to make, I ended up going with Recroom masters. They have several different options in Arcade Cabinet but the 32″ monitor / stand up with the kick plate was the Cabinet for me. Its a sleek Japanese style cabinet but tall enough for the traditional American Arcade gamer. In other words, it was perfect. The price at the time was 549.00. This may sound steep… and if it does, I dare you to look into the price of other Arcade machines. So do this now real quick and come back. Go price them out. Price out other kits, building from scratch, and prebuilt models. If you can beat it then you should do it.
The Recroom Masters Representative I worked with was most excellent. He answered all 5,000 of my questions promptly and couldn’t of been more professional.
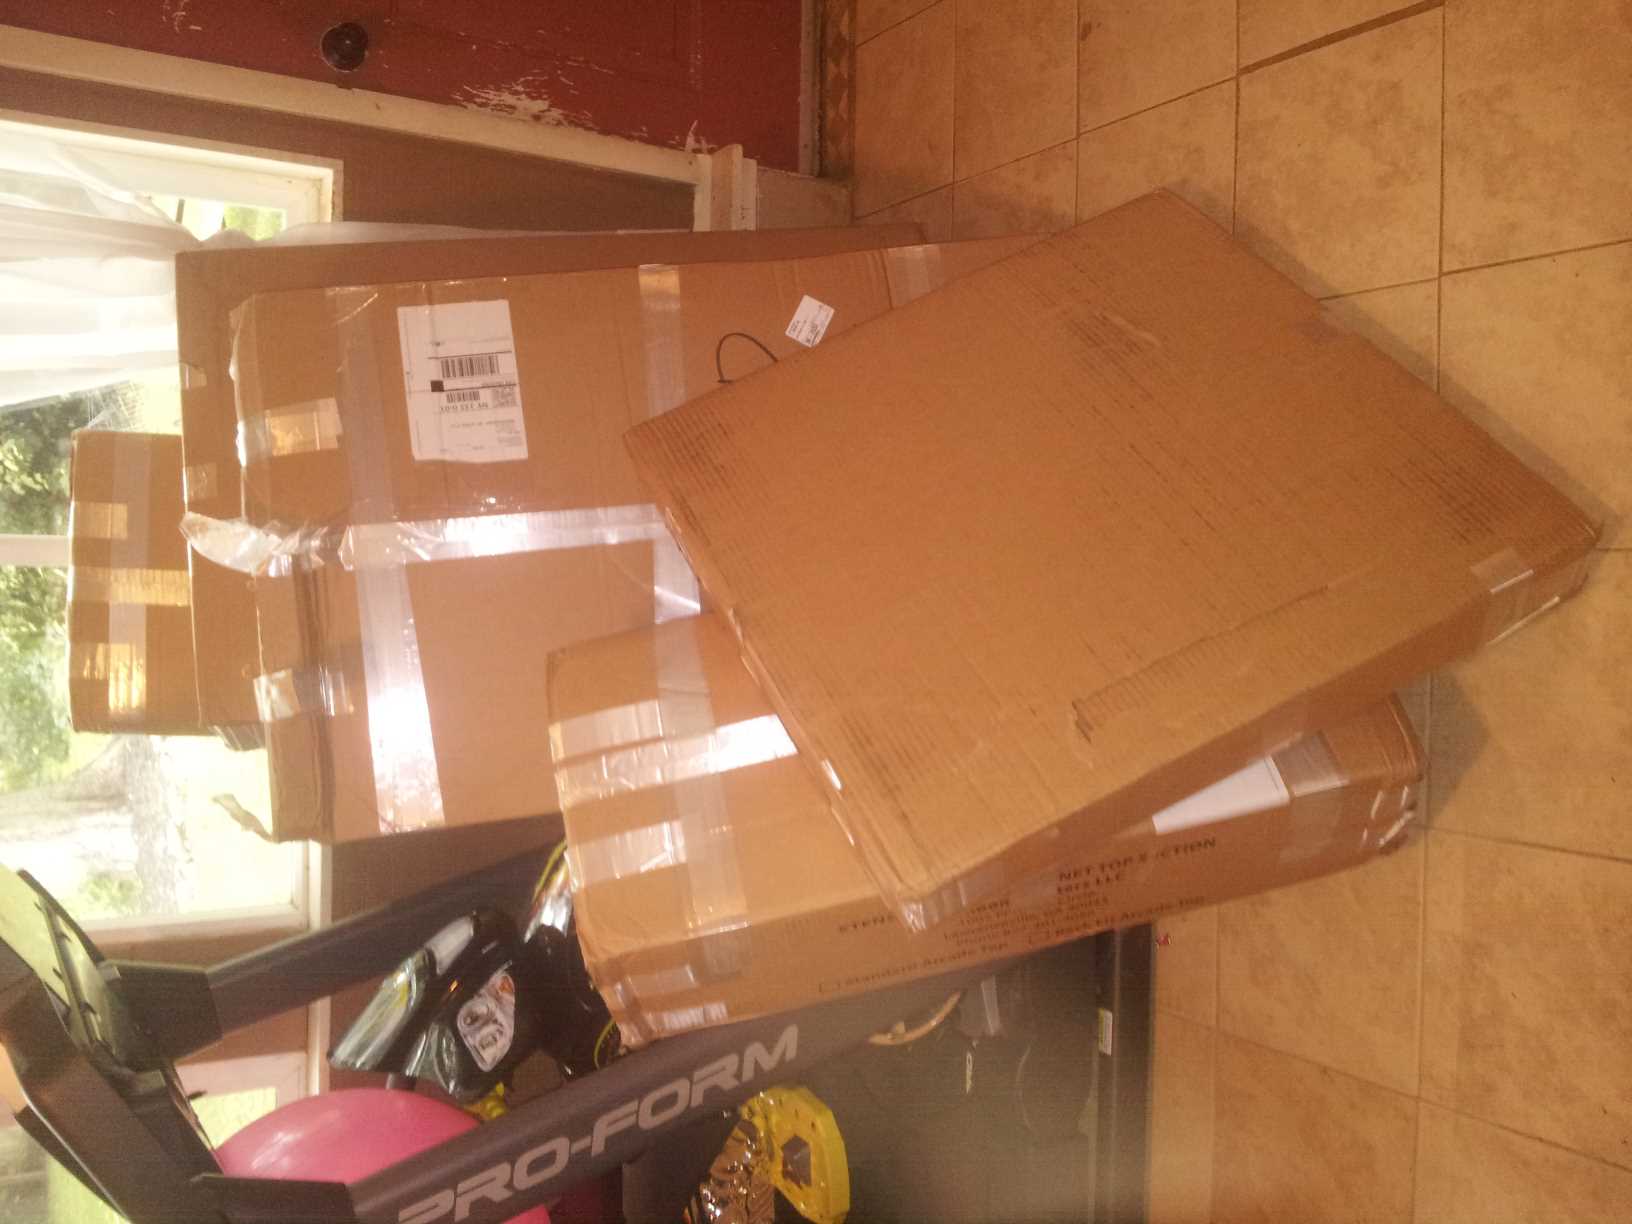
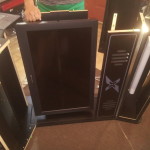
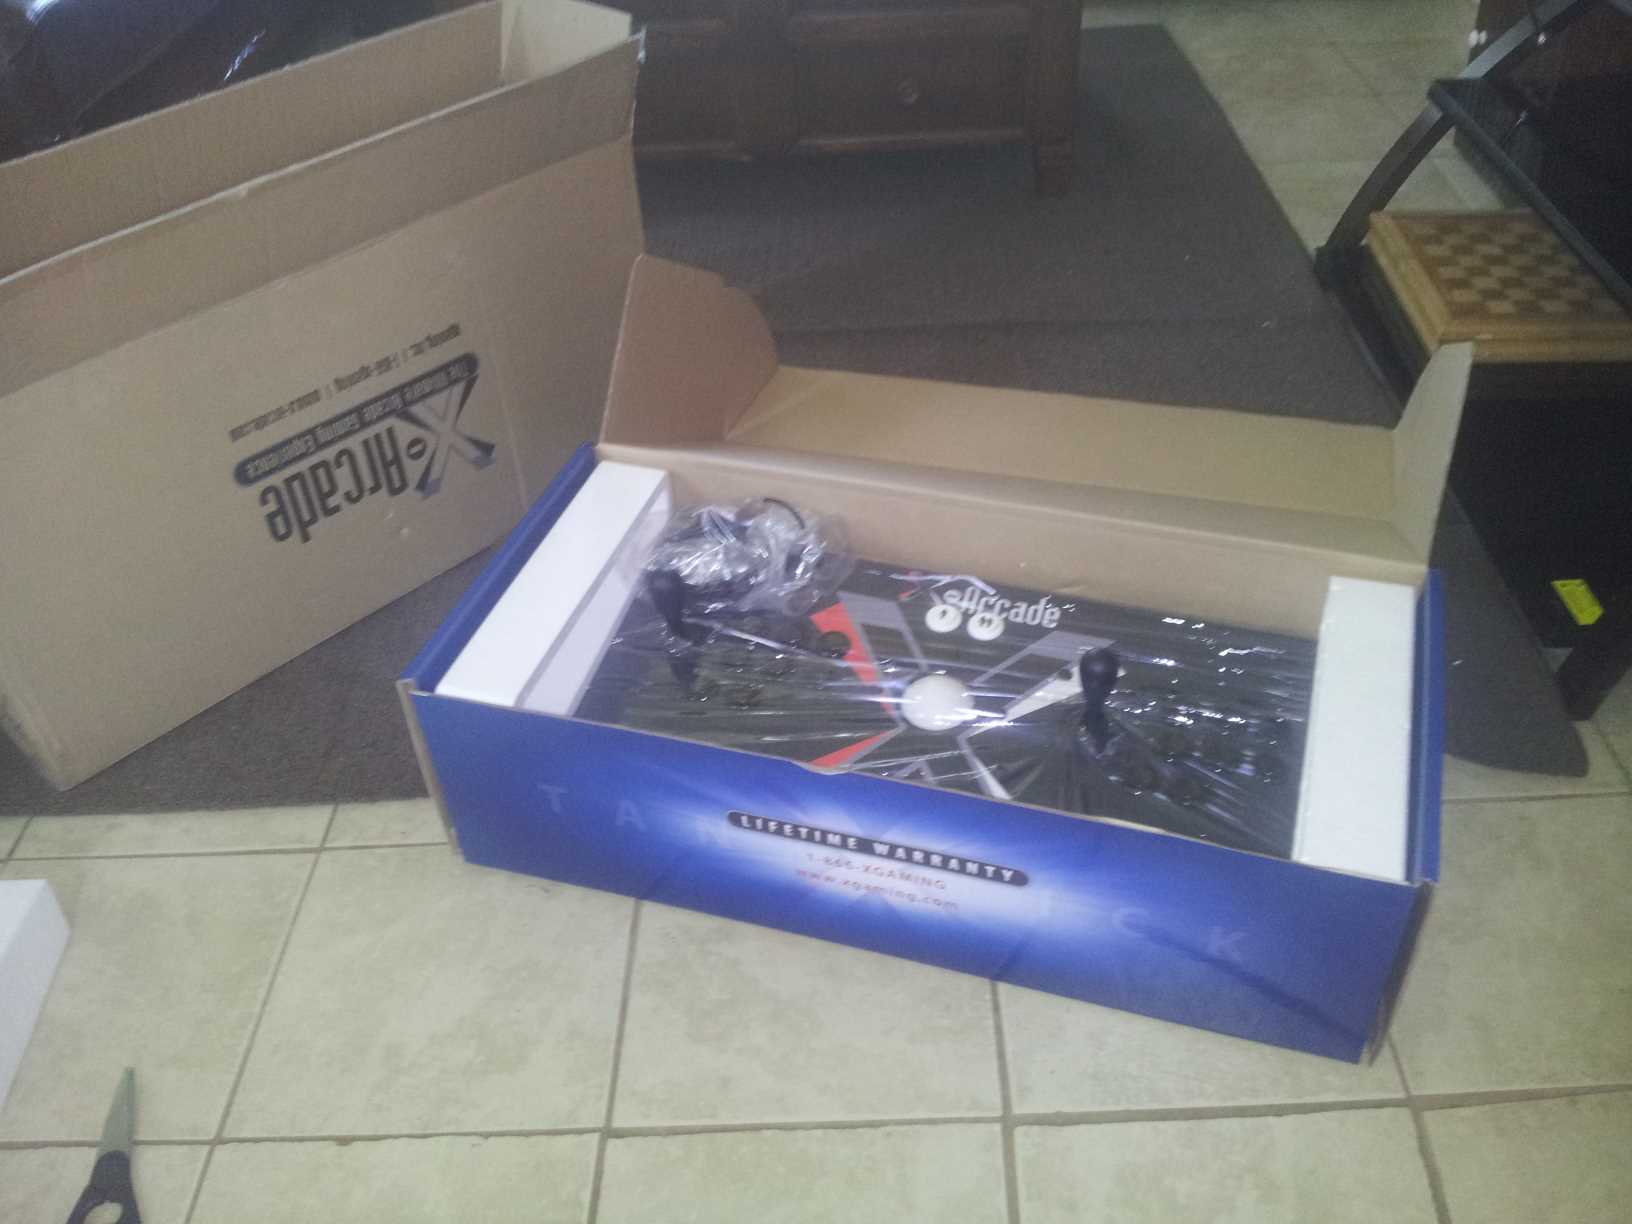
I know I was a nag and his professionalism never wavered a bit. I received the cabinet via UPS ground a week after ordering it. It shipped in several boxes. A few of the boxes were a bit mangled from the UPS trip and I was a bit worried.
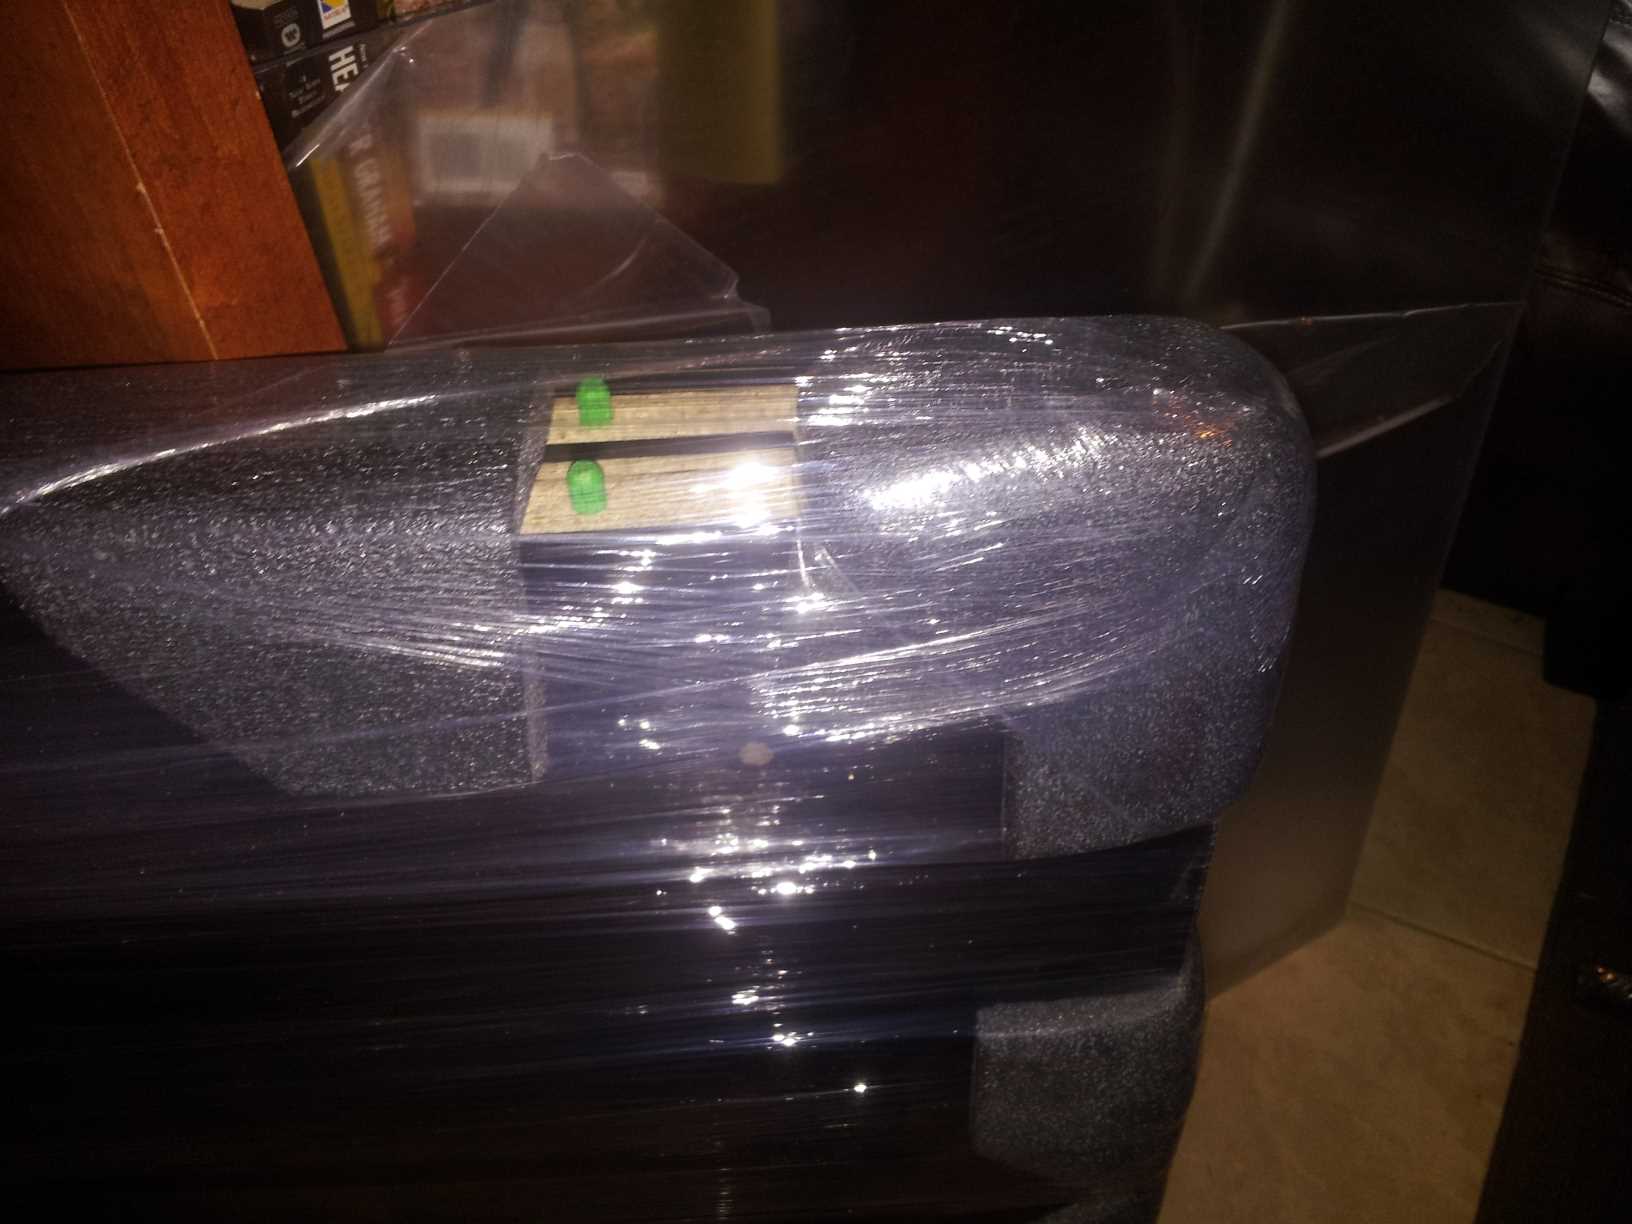
What I found inside was super reinforced and wrapped up so tight and thick with plastic and Styrofoam that my fears were mainly put to rest. There were a few very minor chips in the melamine finish, but they were surely from the journey via UPS. The packages were wrapped better than anything I have ever received in the mail in the past and the dents in the cardboard said it all.
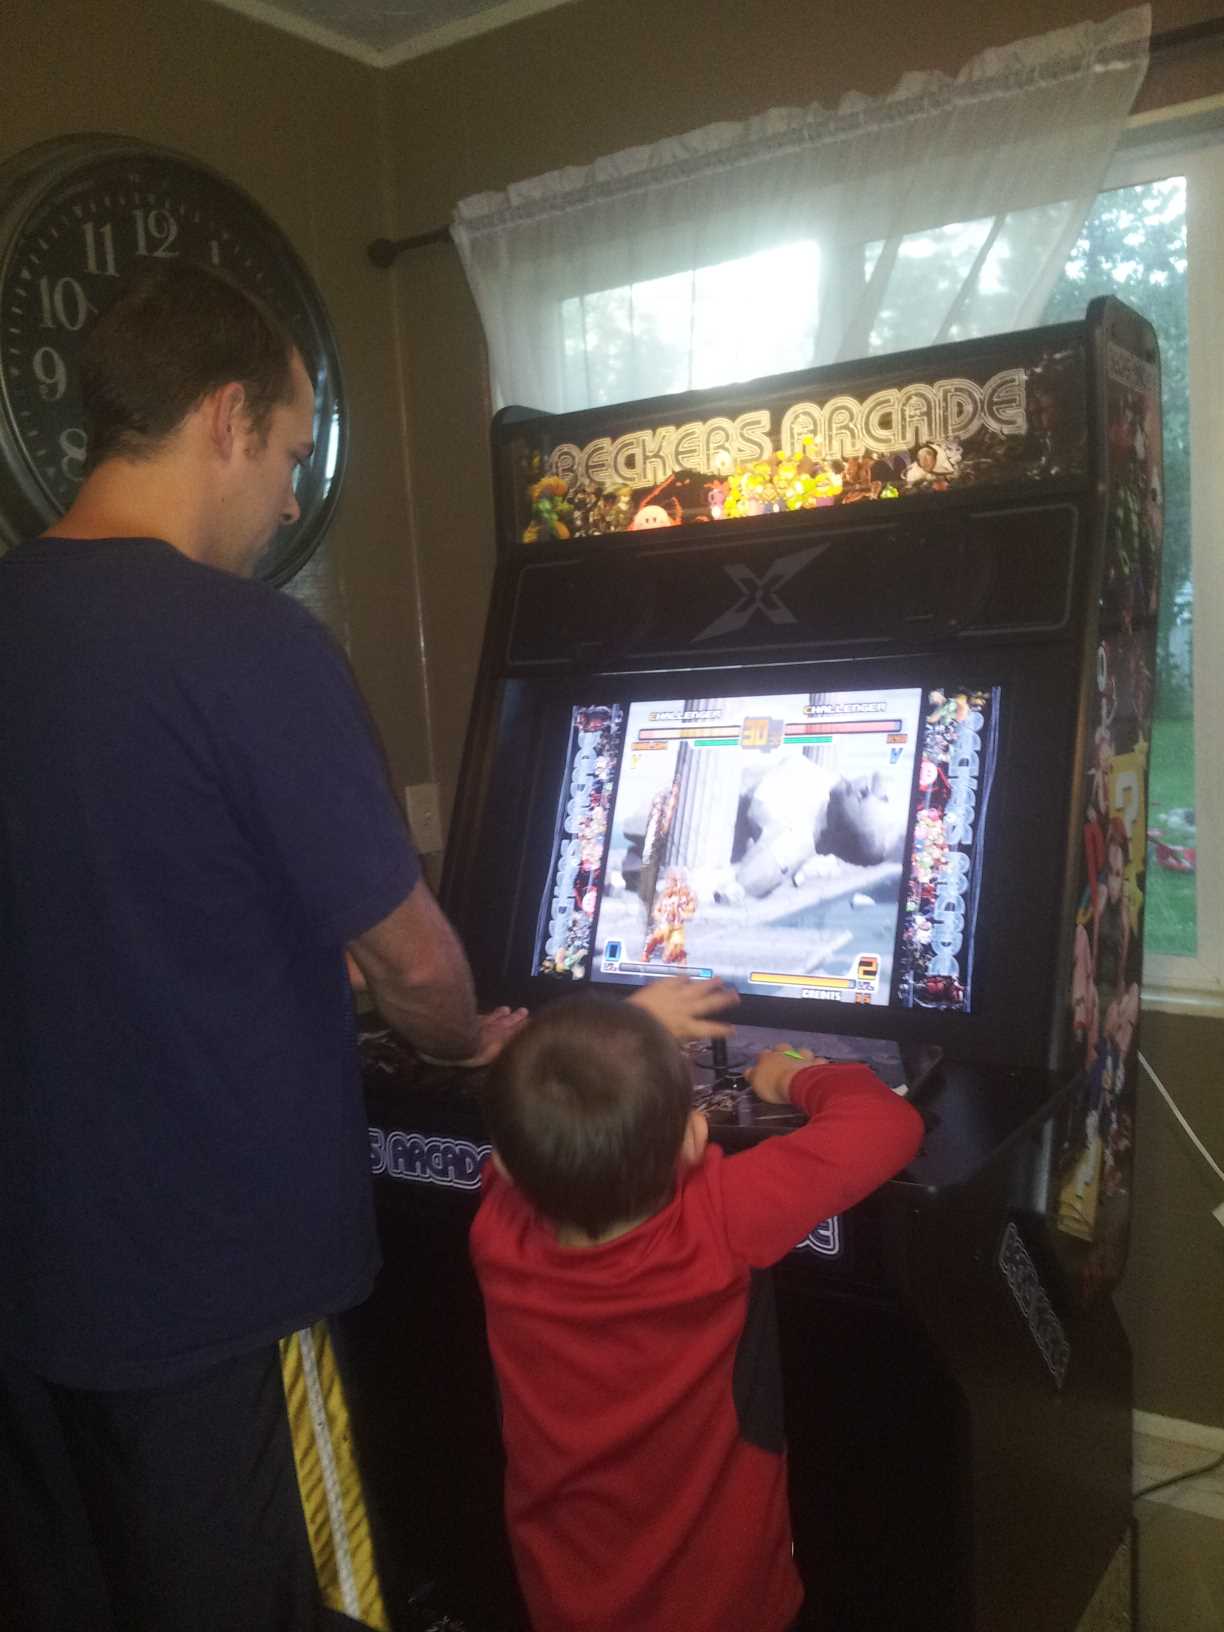
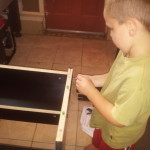
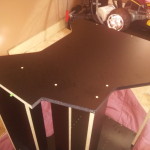
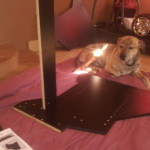
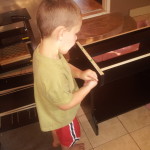
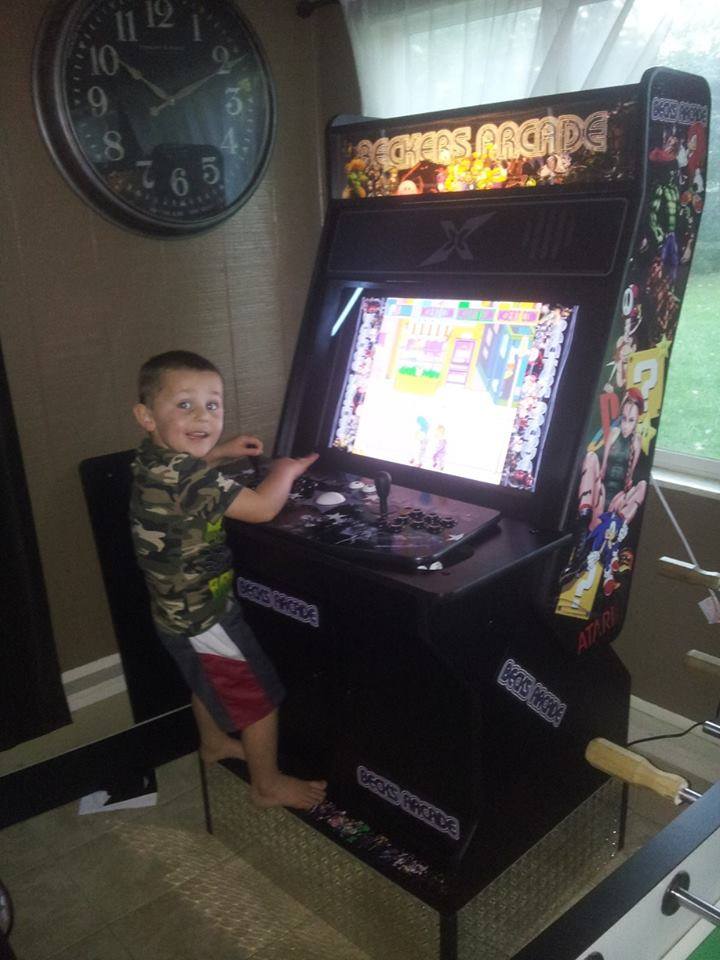
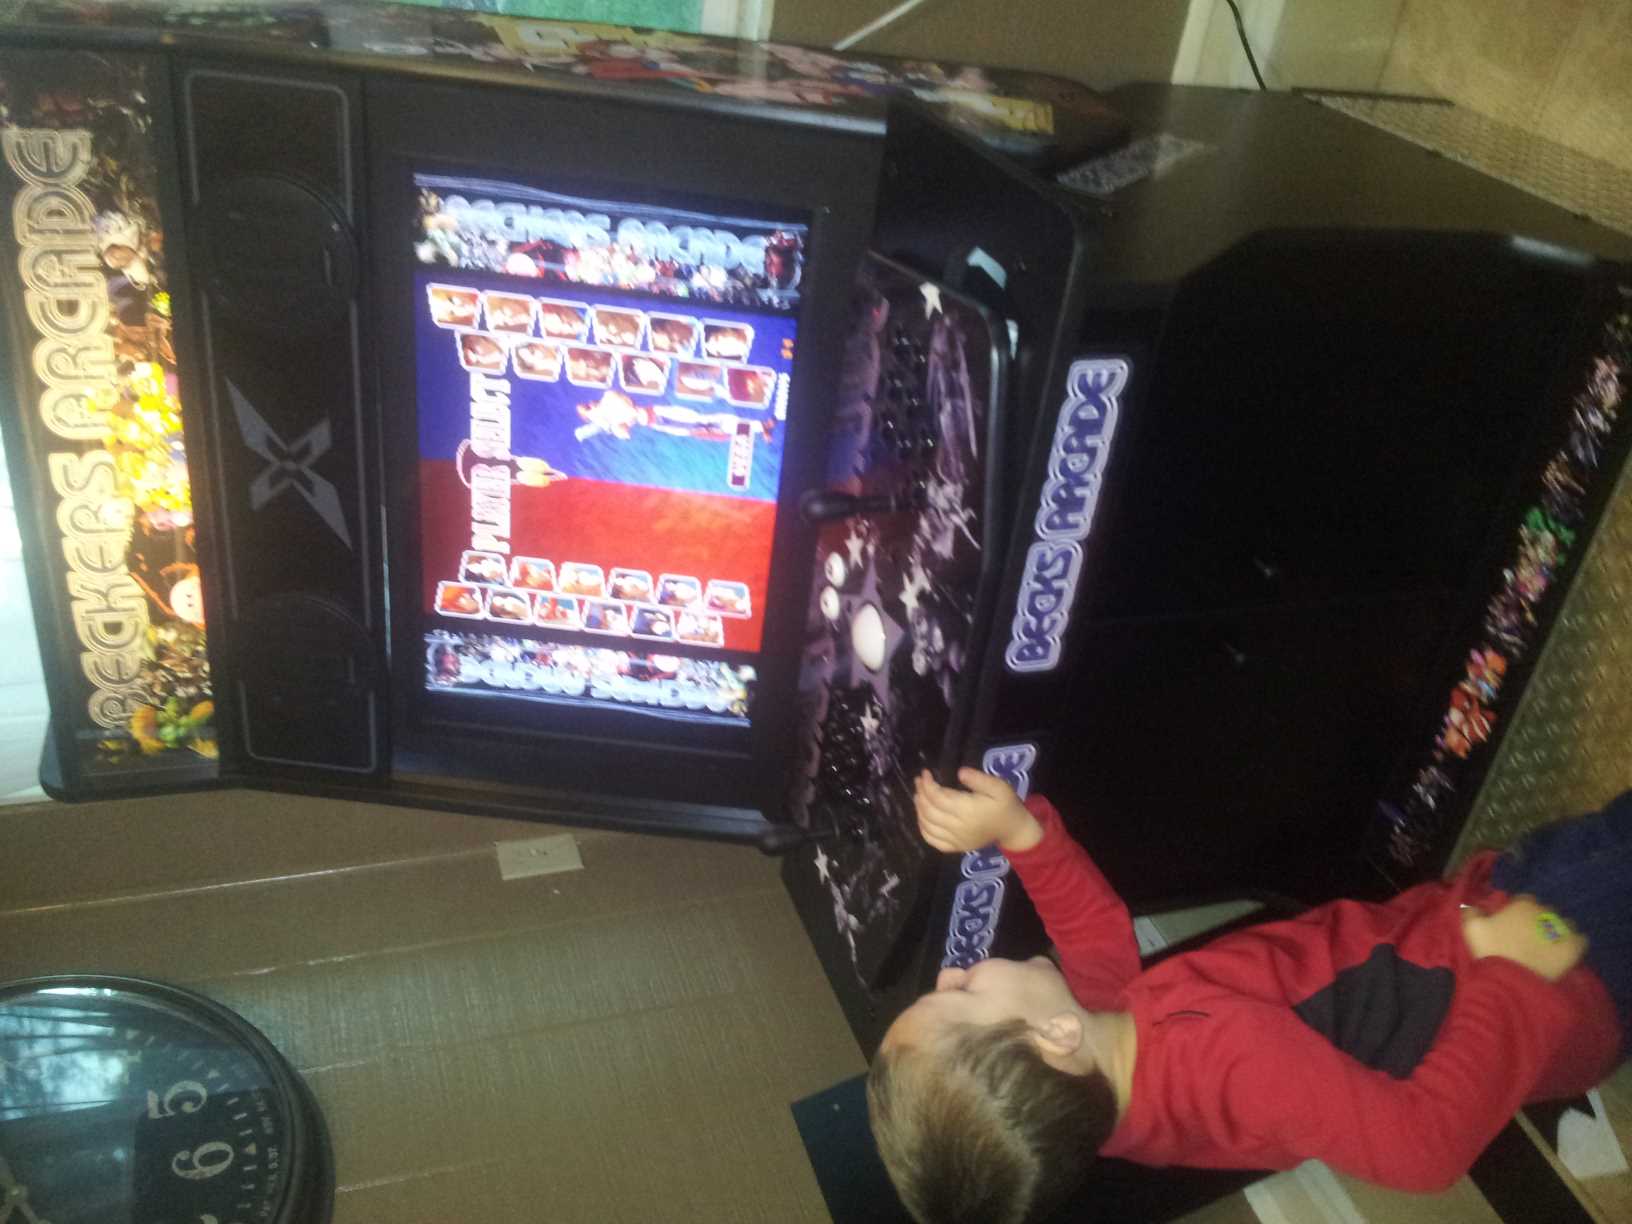
If you can construct IKEA furniture you can put together this cabinet. Its that simple. As you can see in my pictures posted, my 3 year old did the majority of the work. They recommend 2 people during the install buy I can assure you that you can do this by yourself in a few hours. The only time I needed a third hand was to stabilize the monitor and mounting board before placing the last side board on, and my toddler assisted. After unpacking everything I ended up with around 30 pieces or so in total and followed the instructions that shipped with the package.

1. The monitor screws for my monitor were not included. Luckily I have a hardware store in nuts and bolts laying around the house from tinkering over the years and did not have to leave my house to find replacements. I would have been upset otherwise. =) Official response from Recroom Masters: At the time we were not aware of the 3 different size monitor mounting bolts that flat screen monitor companies used for VESA Standard thread and we now 3 VESA standard thread sizes include M4, M5 and M6 bolts ship with every cabinet.
2. One small portion of the instructions were color coated as you will see. The instructions however were printed out in Black and White so I had to hunt to find the colored version of the instructions online. I wont lie I couldn’t find them anywhere. Support had to email me a copy. Official response from Recroom Masters: my production manager recently insured me that he would not be printing instructions sheets in back and white anymore due to the color coding reference and told me that he had taken it upon himself to print them in back in white on the pervious production run in order to try to save the company money although I did not approve this change in production.
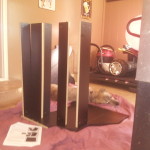
As I mentioned before this thing constructs like a breeze otherwise. Take your time though, while the instructions are straight forward it may be confusing to some as the parts themselves are not directly labeled. If you take your time to match each part in the diagram you shouldn’t make any mistakes what so ever. You build the majority of the cabinet on its side but the last thing you want is to have to retract a few steps to fix a mistake, especially if you are half way complete. Do it right the first time.
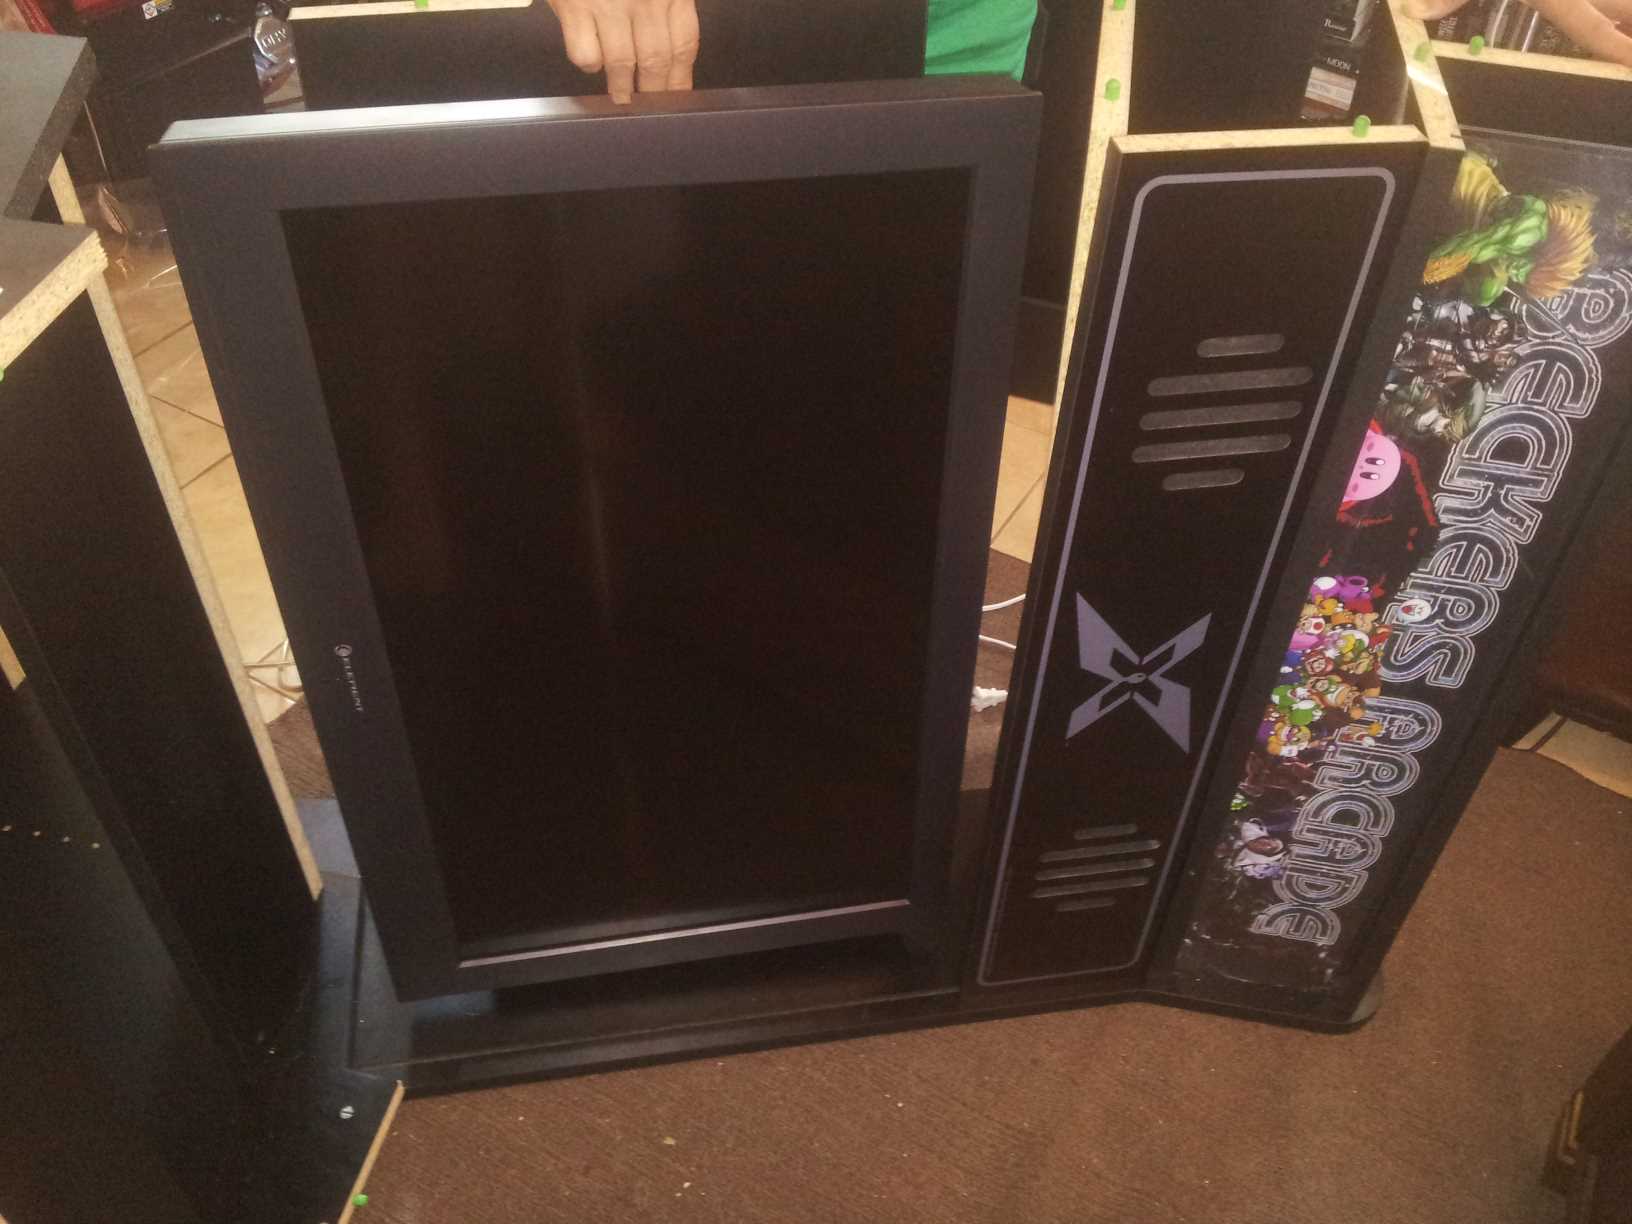
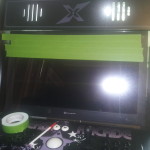
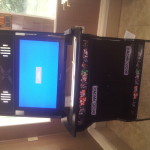
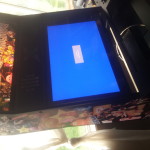
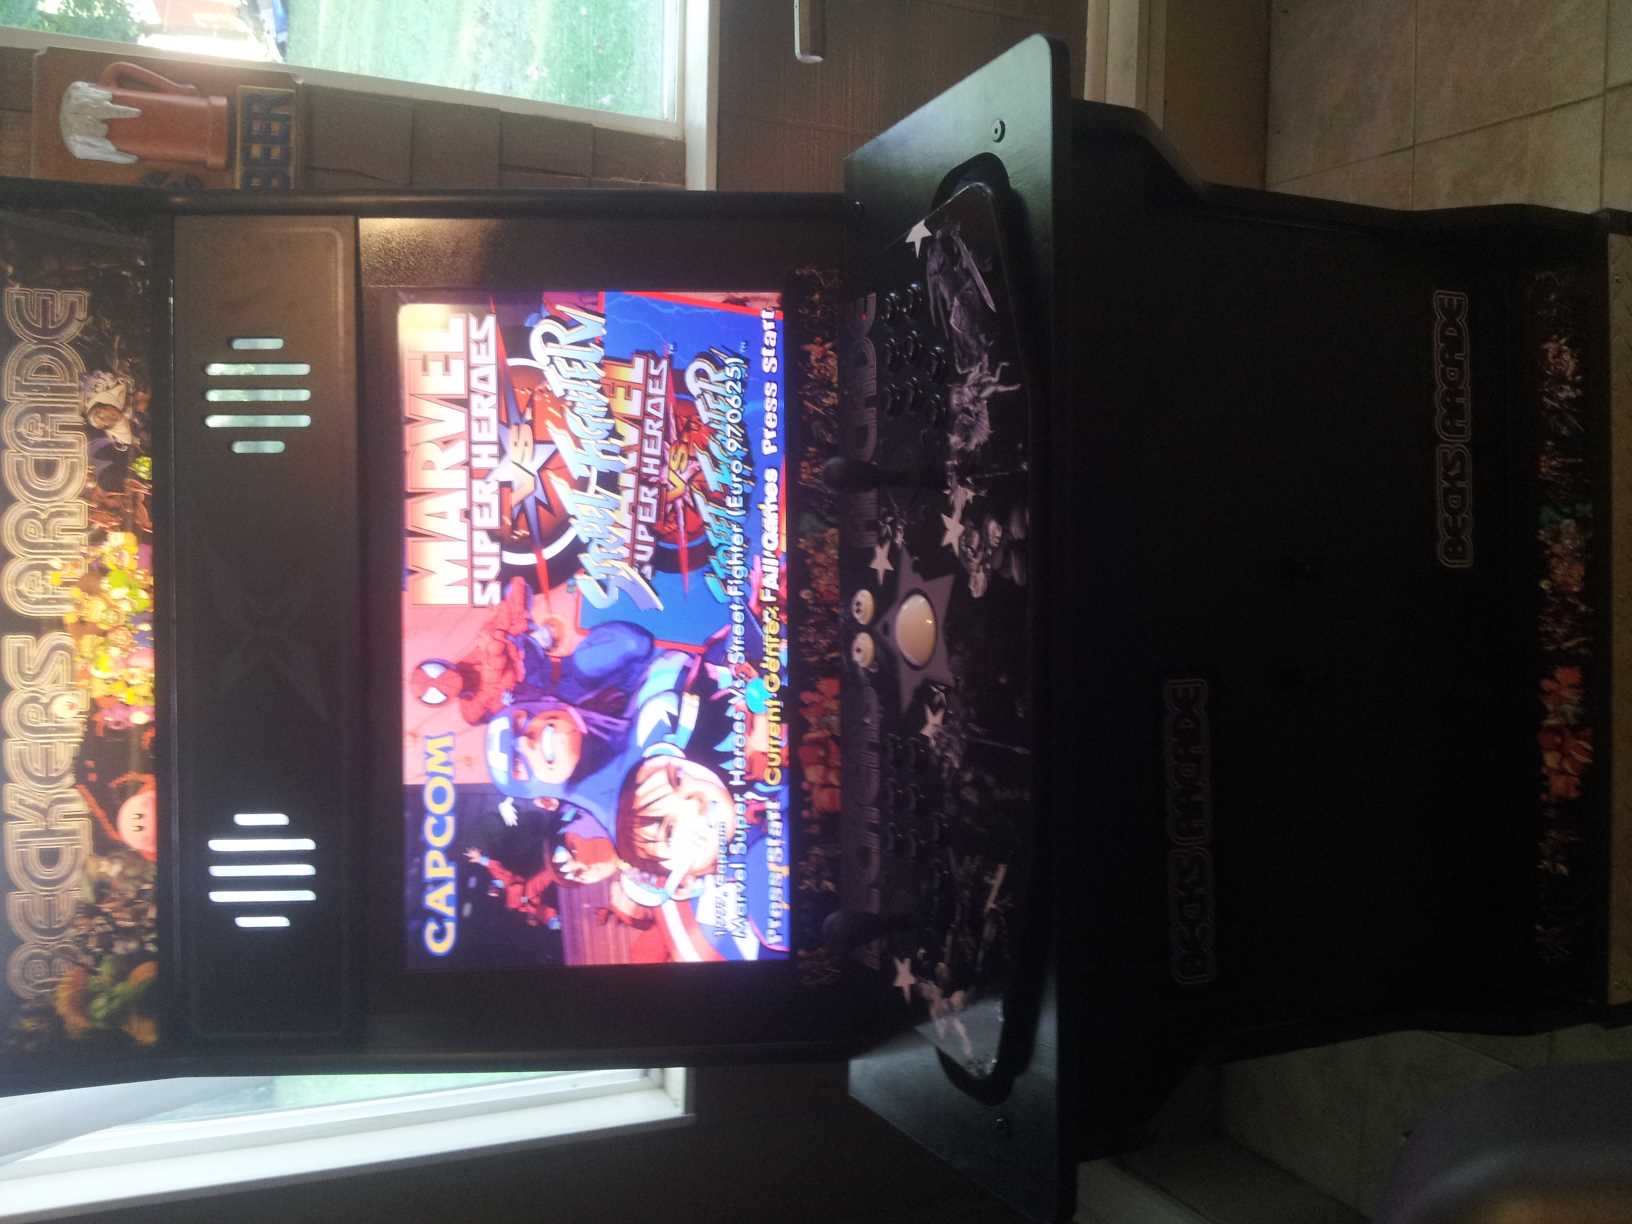
After things were coming along it was time to place the monitor. Now you can use any monitor you like. I tried my hardest to extract a monitor/display recommendation from a sales representative over at Recroom Masters with no luck. I understand why they would not recommend one. They don’t want to be held accountable for any end users margin of error. As I mentioned this thing holds up to a 32″ display so you might as well max it out. Even with a 32″ there were still some open spaces around the display but that’s nothing a little painters tape and spray paint on the plexiglass wouldn’t fix.
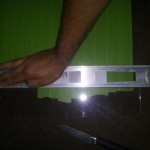

One very important thing to keep in mind is your display input in conjunction with the mounting wood of the cabinet. There is very little space between the two. So if you use a monitor that has inputs coming directly out of the display and not down facing are going to give you fits and you may have to mod your display slightly. See the diagram I have attached to select the proper display.
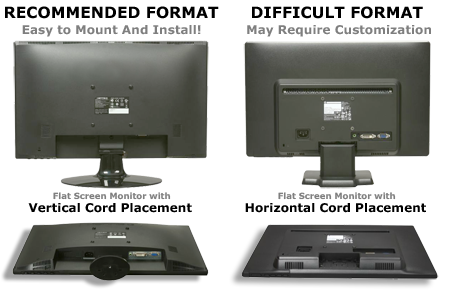
Lastly hook up all your wires to the display (HDMI/DVI/Power supply) before attaching it to the mounting board. With this said I wont make a monitor recommendation. I did pick up a Walmart special for under 200.00 and had zero problems. After the monitor is in place and mounted the last side board is placed on. Turn this baby upright and you are almost done. Things are starting to come together.
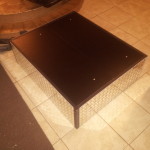
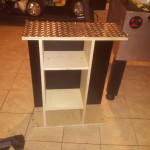
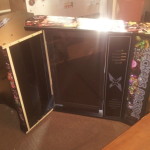
The magnetic doors below are sturdy and easy to open and close. The catch works well and you have a lot of storage space. The shelves inside are set on pins that can be adjusted to height. The back of the cabinet is also wide open for venting purposes I assume. If you like most have a barrage of cables that need to be hidden fear not as they can only be seen from the back and most likely the unit will be up against a wall or in a corner. The cabinet comes with a plexiglass Bezel. While the plexiglass looks OK I feel it leaves much to be desired. The makers suggest using actual glass. As of this writing I only have the plexiglass in place but already have ordered the glass from a local glass shop (smoked) for a modest price of 35.00. I will eventually update this with the glass in place.
More than anything else I look to is the overall build quality and this thing is very solid. I mentioned to Cabinet creators that I was going to review their product unbiased. With that said they offered 10 coupons for me to pass around and they are first come first serve. They are 5% off coupons and individually tailored…. meaning if you want one shoot me an email and I will send you the coupon for the Cabinet. The codes only work once and I only have 10. If you are going to pull the trigger contact me and let me know you are interested and if I have any left to pass out I can give you one.
It weighs in at around 250 pounds with the base in place. You can see photos of my son hanging off of it like he is at the jungle gym for crying out loud. It is built very well. I also put it in for a stress test, pushing on various points that should be weak and it held up with out any give what so ever. You don’t have to worry about this thing falling apart.
I went ahead and picked up a X-Arcade tankstick to use as my control panel and I will get to that amazing piece of hardware in a bit. This machine looks and plays great. Minus a few mishaps that I mentioned earlier on this cabinet is a rock solid thing of beauty. I can not find any complaints. Now if you aim to build your own arcade setup from scratch it will be costly after you finish it with all the trim and fixings. One other thing to mention if I ever tire from standing I can take the kick plate off, but I live in America and it would just feel UN-American to sit down at an arcade machine except for maybe at a racing game.
Do not be afraid of this DIY kit. I put in serious thought for over a year before making the purchase and I am the most skeptical person you will ever meet.
I did all of my homework. My biggest worry was that the construction and build quality was not of arcade grade. My worries were laid to rest and my purchase was worth every penny. I recommend going over the Recroom Masters if you aim to have a sturdy Arcade cabinet that will be in your home for many years to come. The look on your friends and families faces will say it all.
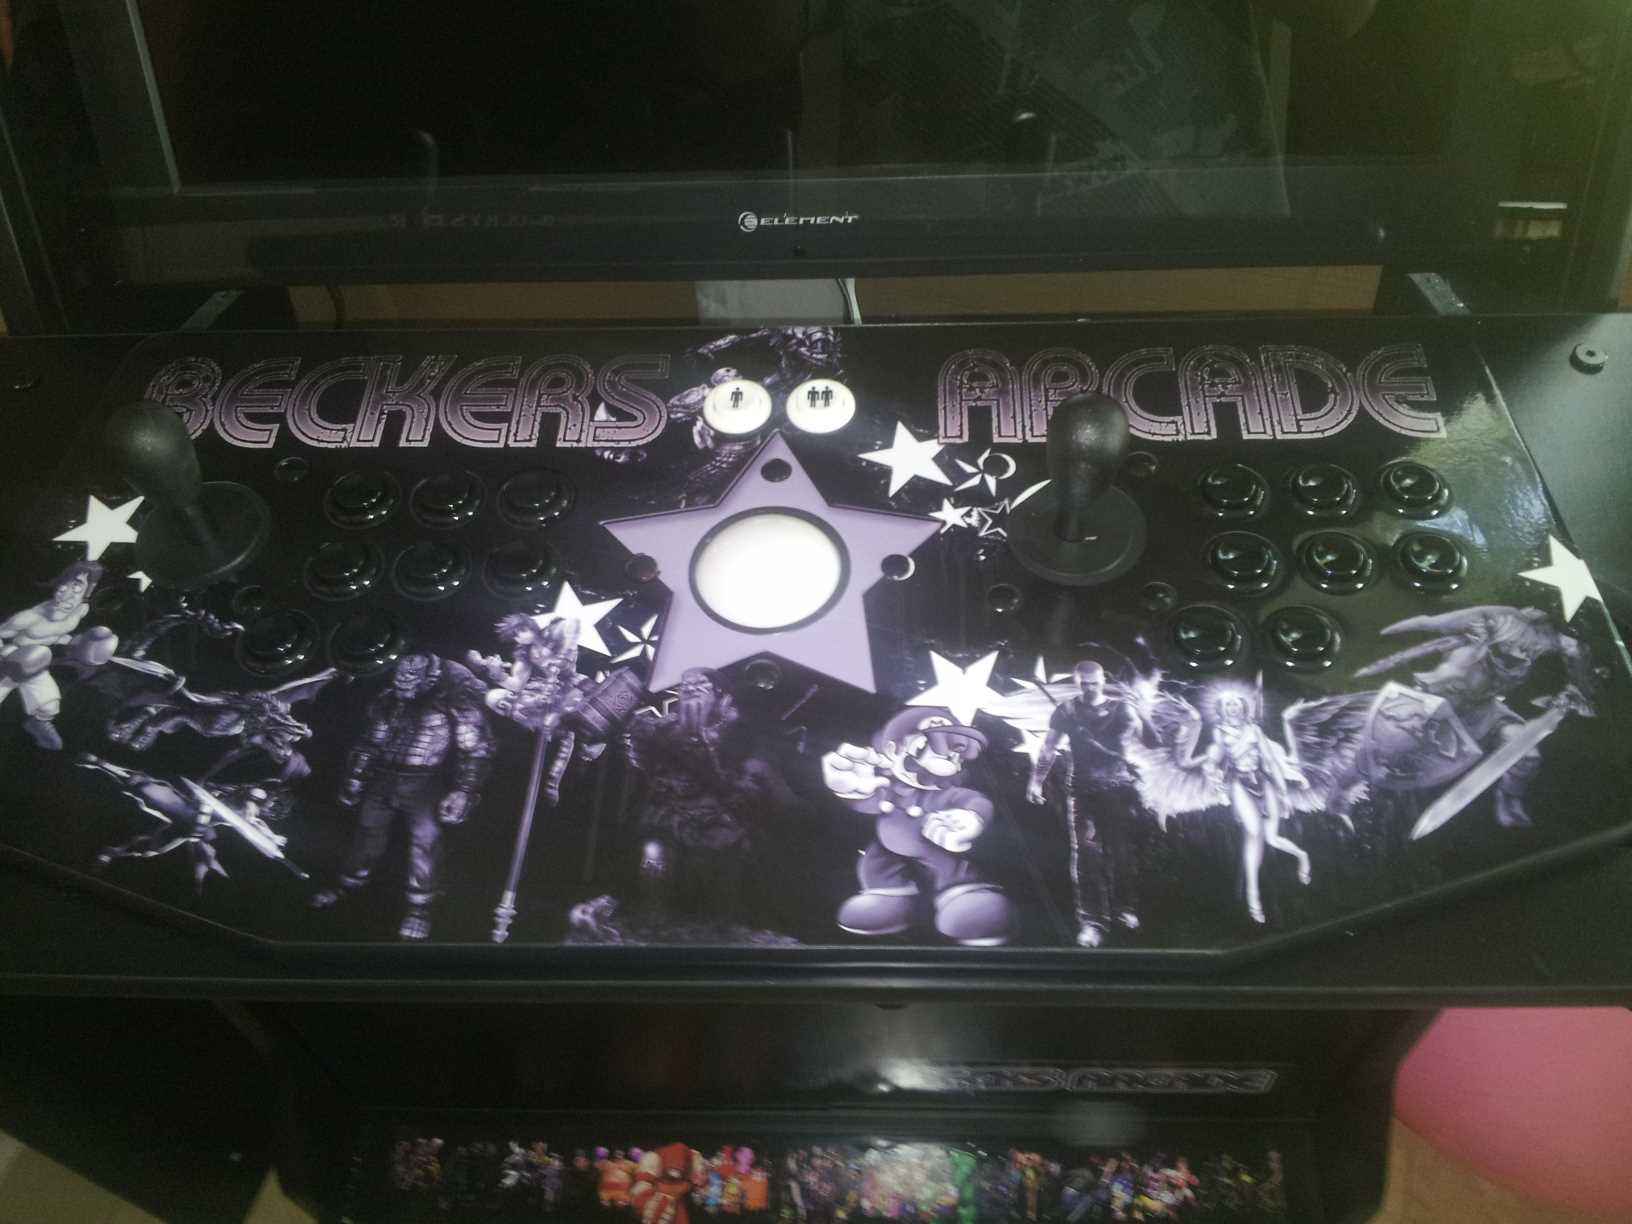
The Control Panel
Once again I thought long and hard over a control panel just as I did with the DIY cabinet. The Recroom Masters Cabinet is built for several different control panels and if you have the
time you can also construct your own. I personally do not have the time in my life right now to tack on another project, so I decided to go with a pre-built control panel. After some brief homework the Xarcade Tankstick seemed to be the most logical choice. The giant package arrived at my doorstep and it was bigger than I even imagined. The thing is HUGE. And that is not a bad thing. Side by side with another full sized adult you have an adequate amount of elbow room. Looking back in retrospect it could have even been a hair wider. Not that you will find one as wide as this. The beast weighs in at around 20 pounds and its 30″ across.
The tankstick comes with both USB and PS/2 interfaces. You need two ports available as one cable connects to the joysticks and the other to the trackball. There are configuration file floating around the net for various emulators but MAME has a tankstick configuration built into the application so the tankstick is recognized automatically. Once again, plug and play.
The center mounted trackball works great with games like Golden Tee (The only trackball game I have tried so far). I was worried about the responsiveness of the trackball and rest assured it feels great, as good as it did in the arcades.
As you can see in the pictures this thing really is built like a tank, as my son hangs from it. They offer a lifetime warranty and I can only imagine they do this because they dont fear recalls. This thing can handle punishment. Setup was quick and simple for my needs. You only need to map your keys to each individual button per emulator and most emulators have configuration files already for the tankstick. I will be honest with you when I say I didnt even open up the instruction manual. This thing is plug and play. I think it is included with some Atari Classics to play with but with MAME you need not another game ever again. The emulator runs thousands and thousands of games…. and every one of your favorites I am sure.
I hear the tankstick can also be setup easily enough with current gaming systems such as the PS3 and Xbox 360 but I have yet to use this feature or purchase the adapters.
The Tankstick has 2 8-way joysticks and 8 buttons for each player. With this layout you can play pretty much every arcade game ever created except games that call for a wheel. I have tried several games so far and everything has been very responsive to my mashing of buttons. Fighting games such as Street Fighter IV and King of Fighters as well as action games such as Metal Slug series play flawlessly and do not skip a beat from what I can remember from my childhood days.
This feels like the real deal, in part because the tankstick is composed of real arcade grade parts. There are also side mounted buttons which I have mapped to insert coins for both players and also flippers for pinball.
I guess if my time an money were not an issue I would build my own control panel. But this is the least expensive solution and it is built far better than I could ever have built it myself being my first time breaking into this stuff. I am more than happy with my purchase. Some people say a 200.00 price tag is steep, and to that I say build a better one for a cheaper price
The Computer
I am not going to spend a lot of time here. All you need is a computer fella. You dont need a top of the line computer to get those arcade classics up and running. Most of your older video game systems require very little memory and processor speed to play them. You can use an old computer you have laying around the house, or pick something up from Craig’s List or Ebay, even a garage sale. Most of the Emulators (Game Systems) will run like a breeze on your old computer rig. A head up though, a few of your emulators, such as Demul (Sega Dreamcast and its Arcade Hardware) are a bit more system intensive. You will need a higher end computer, which in today’s age can still be had at a good price. At any rate, we are talking about old school video games, and an older computer will suffice. So moving on.
The Emulators & Roms
So now you have your arcade cabinet set up, your display mounted, control panel hooked up and your computer in place and connected. What now? Well without the programs and files running on your computer your gaming experience will be null and void. Now to you new readers this may sound a bit technologically advanced but I can assure you this is all very simple. First off you need a few emulators. For now just one. A emulator is just a program created to emulate a specific video game system or arcade hardware. Its just a program that acts like a console for your computer so you can play games. Every video game system you ever played growing up has its own emulators and most systems even have multiple versions and variants. To get your arcade up and running you only need one, MAME. After you have the emulator up and running you then need to find the game files, otherwise known as roms in order to play. This is a very grey area and the legality of using these rom files without infringing on copyrights has been a sore subject for years. With that said I can not personally list any links to ROM files. Like I said the area is grey. If you own a hard version (like a cartridge) of the game, it is said you have right right to back it up in ROM format.
List of Favorites:
The system I built was only for the Arcade in mind and only uses MAME, but you can emulate every system out there! Here are a few of my favorite non MAME emulators.
ePSXe (PSOne)
Project64 (N64)
KegaFusion (Sega Genesis)
The decals And graphics
Attached are a few files to get you started if you decide to go my rout. I have included blank .PSD templates that you can use to create the graphics for your
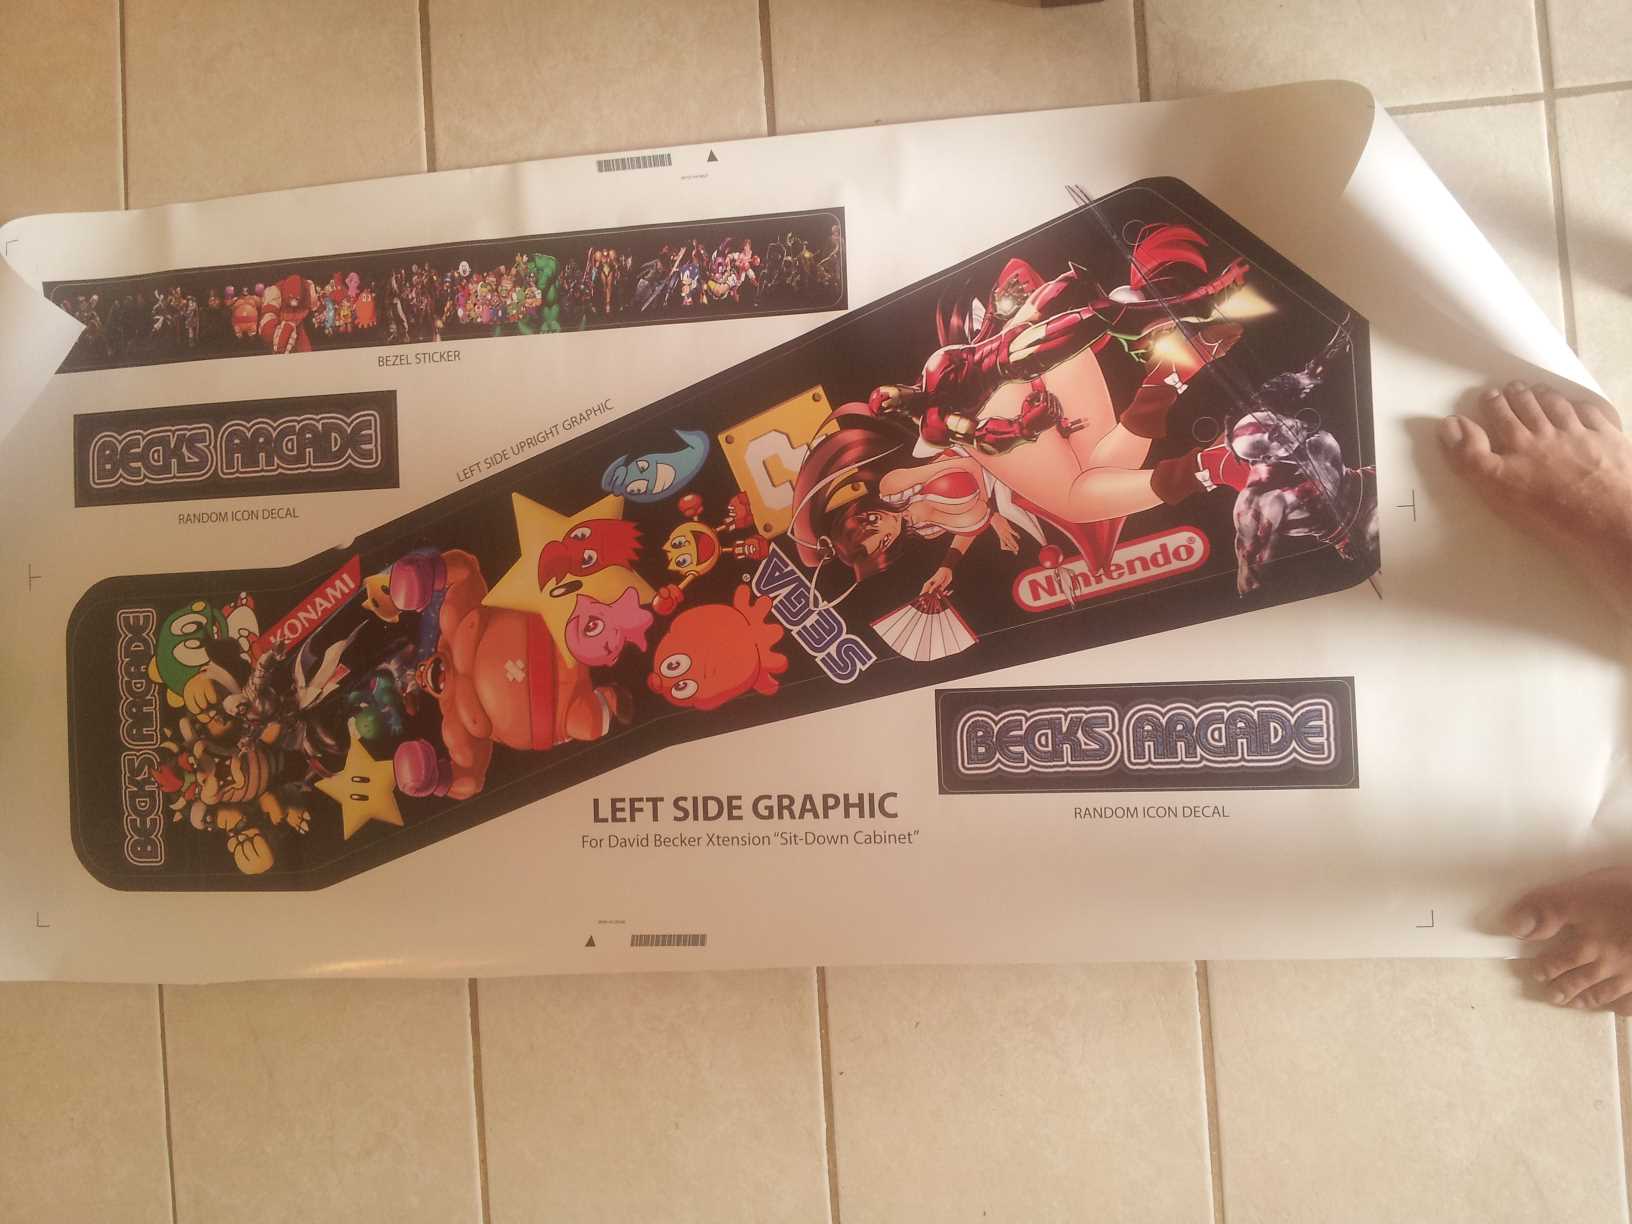
tankstick and also arcade cabinet. From there you can send the files to any Printshop and have them printed up. I suggest going local first and save some money.
If you have no one local to access check out http://gameroomgraphics.com/. I used them and was not displeased. I have to mention that the Overlay for the tankstick ran on both ends. I had to use an exacto-knife to score away the excess in order for it to lay flat and adhere to the base of the Tankstick. After this was complete I had no problems.
Listed below are the blank templates to create your own artwork:
SD_Graphic_Temp
Tankstick_Template_2013.psd
The frontend

What the hell is a front end? A front end is a nice graphical interface for an emulator that usually makes selecting a game pretty. While not needed it certainly makes your gaming experience pop. I recommend Hyperspin and NOTHING else.
I have reviewed it in full here. Select your games in style with HyperSpin, and retain that pretty look and feel. It is the ultimate solution if you are looking to build your own arcade cabinet, but to tell you the truth, a lot of gamers just make a HyperSpin box and hook it up in the living room. Who wants to stand the entire time? We Americans are LAZY. HyperSpin is one amazing front end. If nothing else it is the best looking of all front ends in my eyes, downright sexy. Words cant explain how nice this thing looks. You need to try it yourself. A video of it in motion is posted there as well..
My overall cost
Cabinet: 549.00 Send me a message and If I have any left I can offer discounted coupons.
Control Panel: 199.00 Tankstick
Computer: Free
Display 200.00
Spray Paint and Tape: 5.00
Glass Bezel replacement: 35.00
Total spent: $988.00
Years of retro-gaming relived: priceless
I hope this has helped. I will update this post a few times before it is over I am sure. There are still a few things I want to tweak and as I do and make improvements I will revise this blog post.
-David


Nice write-up…thx
I was mulling over the same idea, but ended up buying an all original Neo-Geo 4 slot since I was mainly planning to play Neo Geo games anyways (Samurai Showdown especially).
But now I am thinking of replacing the CRT with an modern LCD/LED flat-panel with requisite conversion parts for signal/frequency etc.
Thanks. Those big CRTS are awfully heavy and expensive. There are some pros over LCD/LED I guess but for me I had no choice really….