 Retro Replay Retro Replay gaming reviews, news, emulation, geek stuff and more!
Fast and Easy RetroArch + ES-DE Setup Guide
RetroArch is incredibly powerful, but nobody would accuse it of being immediately friendly. Between cores, overrides, BIOS files, hotkeys, shaders, controller profiles, and several different ways of saving settings, it is very easy to spend more time configuring RetroArch than actually playing anything.
This guide is meant to avoid that. We are going to build a clean emulation setup around RetroArch and ES-DE, organize everything into one manageable folder structure, configure the settings that actually matter, and finish with a frontend that lets you browse and launch your games without digging through RetroArch every time.
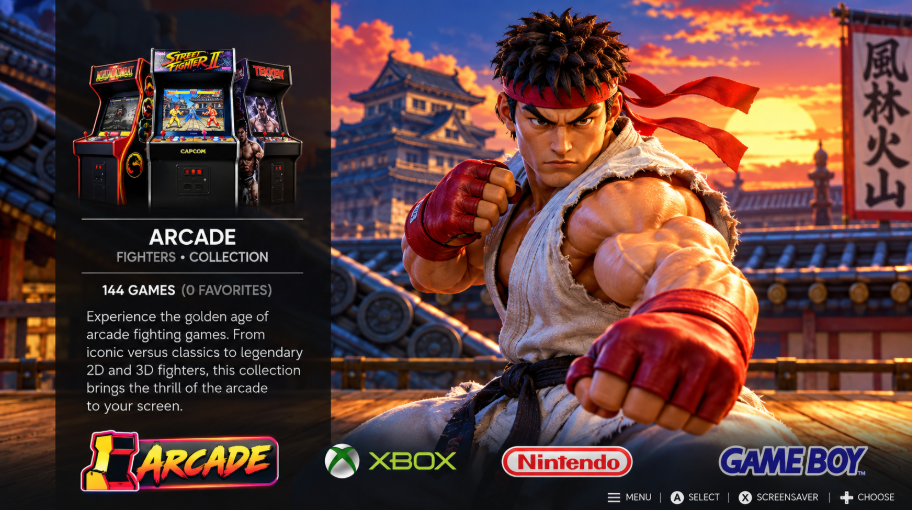
RetroArch will handle most of the emulation itself, while ES-DE gives the collection the polished console-style frontend it deserves. For a handful of systems, standalone emulators still make more sense, and we will account for those too.
What You Need Before Starting
Get these four things together first:
- The latest RetroArch build. I prefer the ZIP version instead of the installer because it makes keeping the entire setup portable much easier.
- ES-DE Portable. This becomes the frontend you use to browse and launch your collection.
- Your game folders. Keep each system separated rather than dumping everything into one directory.
- Your BIOS and firmware files. Keep legally obtained BIOS files from hardware you own together in a dedicated folder.
ES-DE will be the part you actually see most often once everything is finished. RetroArch sits underneath it, launching the appropriate emulator core, handling controller input, and managing saves.
You can use RetroArch for a huge number of systems, including arcade hardware, PC Engine, NES, Game Boy, SNES, Game Boy Color, Game Boy Advance, Master System, Genesis, Game Gear, Sega CD, 32X, Saturn, Dreamcast, and many others.
For systems such as Nintendo 64, Nintendo DS, PlayStation, PlayStation 2, and several newer machines, you may prefer a standalone emulator. We will still launch those through ES-DE so the entire library remains under one frontend.
Step 1: Build a Clean Folder Structure
Start by extracting the portable version of ES-DE. One of the advantages of doing this as a portable installation is that your frontend, emulators, games, and related files can all live underneath one master ES-DE directory. That makes the collection much easier to back up or move to another computer later.
Inside ES-DE, locate the Emulators folder. Extract RetroArch and move the complete RetroArch folder into it. Rename the folder simply:
RetroArch
Make sure opening that folder takes you directly to the RetroArch executable. You do not want an unnecessary second RetroArch folder nested inside it.
Organizing Your ROM Folders
ES-DE includes predefined system folders. Put your games into the appropriate folders inside ROMs_ALL. If you are unsure which abbreviation ES-DE expects for a particular platform, check the included systems.txt file.
After you have populated the systems you actually use, move those populated system folders from ROMs_ALL into the regular ROMs directory. Do not rename them, because ES-DE relies on those expected folder names when identifying systems.
Use CHD Where It Makes Sense
Disc-based collections can consume an absurd amount of storage. For systems such as PlayStation, PlayStation 2, PSP, Dreamcast, Sega CD, and Sega Saturn, CHD is a very useful format because it compresses disc images substantially without requiring you to juggle BIN/CUE files all over your collection.
If your existing collection uses BIN/CUE or ISO files, a CHD conversion tool can help you reduce the footprint while keeping everything much cleaner.
Other systems have their own preferred formats. Nintendo 3DS collections may use CCI/ZCCI, Wii U can use WUA, and Xbox collections may use XISO-style images. For most cartridge-based Nintendo, Sega, and PlayStation-era systems, the formats you already use will generally remain straightforward.
Cleaning Up Multi-Disc PlayStation Games
Multi-disc PlayStation games can also be organized so ES-DE presents the entire game as a single entry instead of displaying Disc 1, Disc 2, Disc 3, and so on as separate games.
Create a folder for the game and place its individual disc images inside it. Then create an .m3u playlist containing the filenames of each disc, one per line. ES-DE can use that playlist as the single launch point for the complete game.
This is especially useful for RPGs and other multi-disc PlayStation releases. If you have a very large collection, the folder and playlist creation process can also be automated with a simple PowerShell script.

Do not use this approach for PlayStation 2. The emulator workflow is different and the same multi-disc method is not supported in the way it is for PS1.
Step 2: Understand How RetroArch Saves Settings
This is probably the most important RetroArch concept to understand before touching anything else.
RetroArch does not have one single way to save settings. It lets you decide how broadly a setting should apply. Once you understand that distinction, RetroArch becomes dramatically easier to manage.
Global Configuration
The main retroarch.cfg configuration applies across RetroArch. Use this for settings you want everywhere, such as interface choices, fullscreen behavior, audio preferences, general hotkeys, and other global changes.
Save these through:
Main Menu → Configuration File → Save Current Configuration
Core Overrides
A core override applies to everything using one particular RetroArch core. This can be useful when one core handles several closely related systems.
For example, Gambatte can handle both Game Boy and Game Boy Color, and those two systems are similar enough that sharing certain settings can make sense.
For most of this setup, however, I prefer Content Directory Overrides because they give you more precise control over each console.
Content Directory Overrides
This is the method we will use for most console-specific input settings.
A content directory is essentially your ROM folder for a system. If you save an override for your SNES directory, those settings apply to the SNES games in that folder without affecting Genesis, Game Boy, or anything else.
Once a game is running, use:
Quick Menu → Overrides → Save Content Directory Overrides
This is extremely useful for controller layouts, scaling, shaders, and other settings that should follow a console rather than every game in RetroArch.
Game Overrides
Game overrides go one step further and apply only to the currently loaded game.
Use these when one title needs unusual controls or a setting that you do not want applied to the rest of the system.
Core Options and Shader Presets
Some emulator cores expose additional settings through Core Options. These can include things such as internal resolution or console-specific rendering options. They can also be saved at the content-directory level.
Shaders have their own preset system and can similarly be saved globally, by core, by content directory, or for one game.
For the rest of this guide, we will use the global configuration for general RetroArch behavior and content-directory overrides when we start customizing individual systems.
Step 3: Give RetroArch a Better Interface
Launch RetroArch and go to:
Settings → Drivers → Menu
Select:
XMB
Return to the main menu and save the current configuration. Close RetroArch and reopen it.
You should now have the familiar blue XMB-style interface, which is considerably easier to navigate once you begin moving between cores, playlists, settings, and games.
Step 4: Update RetroArch
Before downloading cores, it is worth updating RetroArch’s supporting files.
Go to:
Main Menu → Online Updater
Scroll through the available update options and run the appropriate items beginning with Update. Once they finish, save the global configuration again.
Step 5: Download Your Emulator Cores
RetroArch calls its individual emulators cores. Instead of installing a separate application for every system, you download the cores you actually want to use.
Open:
Main Menu → Online Updater → Core Downloader
Useful cores include:
- Gambatte — Game Boy and Game Boy Color
- mGBA — Game Boy Advance
- Mesen — NES and related Nintendo hardware
- Snes9x — Super Nintendo
- Genesis Plus GX — Sega systems
- PicoDrive — Genesis, 32X, and related Sega hardware
- Beetle Saturn — Sega Saturn
- YabaSanshiro — Sega Saturn
- Flycast — Dreamcast and supported arcade hardware
- MAME 2003 Plus — Arcade
- FinalBurn Neo — Arcade
- FB Alpha 2012 — Older arcade configurations
- Beetle PCE — PC Engine/TurboGrafx
You do not need to download every core RetroArch offers. Install the ones that correspond to systems in your collection.
For certain platforms, I prefer standalone emulators instead. Examples include melonDS for Nintendo DS, Simple64 for Nintendo 64, DuckStation for PlayStation, and PCSX2 for PlayStation 2.
Step 6: Tell RetroArch Where Everything Lives
Now point RetroArch toward your games and system files.
Set the Start Directory to your main:
ES-DE\ROMs
Then create a dedicated BIOS folder inside your main ES-DE directory. You might simply call it:
BIOS
Set RetroArch’s System/BIOS directory to that location.
Keep the BIOS files RetroArch needs directly inside that folder unless a particular emulator specifically requires something different. A number of systems depend on firmware or BIOS files, especially disc-based and later-generation hardware.
Step 7: Import Your Games Into RetroArch
RetroArch still needs to know which game directories you want it to scan.
Navigate to:
Import Content → Manual Scan → Content Directory
Select one of your system folders, choose Scan This Directory, then return to the manual scanning screen and select Start Scan.
Repeat that process for each system you intend to launch through RetroArch.
Once the scans are complete, save the global configuration.
Step 8: Clean Up the RetroArch Experience
At this point RetroArch works, but we can make it behave much more like a dedicated game console. The next group of settings handles fullscreen launching, notifications, fast-forwarding, save states, hotkeys, and other everyday conveniences.
One important rule before continuing: do all of your global configuration before creating console-specific controller overrides. Once you begin saving overrides for individual systems, changing a global setting later can require additional cleanup.
User Interface
Under the user interface settings, I prefer:
- On-Screen Notifications: Off
- On-Screen Overlay: Off
Disabling notifications produces a cleaner launch experience, although it also hides configuration-save confirmation messages. If you ever have trouble determining whether RetroArch is saving properly, temporarily turn notifications back on.
Fullscreen Video
Under Settings → Video, configure RetroArch to launch fullscreen.
- Fullscreen Display: On
- Windowed Fullscreen Mode: On
Use the native resolution of your display where appropriate — for example 1920×1080, 2560×1440, or 3840×2160.
Audio
One small setting makes fast-forwarding much less obnoxious:
Fast-Forward Audio Mute: On
Now you can speed through loading screens, grinding, introductions, or other slow sections without listening to the audio turn into a chipmunk convention.
Step 9: Set Up Useful Controller Hotkeys
Good hotkeys are one of the things that make RetroArch feel dramatically better once everything is configured.
I use the controller’s Select button as the hotkey enable button. That means RetroArch commands require Select plus another button, reducing the chance of accidentally triggering something during gameplay.
Under Settings → Input → Hotkeys, a practical setup is:
- Hotkey Enable: Select
- Menu Toggle: Top face button — Y on Xbox-style controllers or Triangle on PlayStation
- Quit: Start
- Fast-Forward Toggle: Right Trigger / RT / R2
- Load State: LB / L1
- Save State: RB / R1
With this layout, Select + Start becomes your normal way of leaving a game, while Select plus the other assigned buttons handles RetroArch functions.
I also disable:
Confirm Quit/Close/Reset
That way exiting through your controller behaves immediately instead of opening another confirmation dialog.
Step 10: Latency and Fast-Forward
If your hardware can handle it, the source setup uses:
- Run-Ahead: Second Instance Mode
- Frames to Run Ahead: 1
For fast-forwarding, a starting point of around 2.5x works nicely, although this is entirely personal preference.
Step 11: Automatic Save States
RetroArch can make jumping in and out of games nearly seamless.
Under the save settings, enable:
- Save State Thumbnails
- Auto Save State
- Auto Load State
With auto-save and auto-load enabled, RetroArch can save the current state when you leave and resume it when you return.
I still recommend using the game’s normal built-in save system whenever possible. Save states are convenient, but traditional saves make a much better long-term backup.
Step 12: Configure Controller Input Properly
This is one area where it is worth slowing down and doing things carefully.
Load a game from the console you want to configure, then open the RetroArch menu using your hotkey combination.
For the setup described here, disable:
- Input → Autoconfig
- Input → Remap Controls for This Core
Save the global configuration and restart RetroArch before continuing.
Xbox-Style A/B Layout
If you prefer the Xbox-style face-button arrangement rather than Nintendo’s A/B positioning, change your Port 1 controls so:
- A uses the bottom face button.
- B uses the right face button.
If that makes navigation inside RetroArch feel backwards, use:
Input → Menu Controls → Menu Swap OK and Cancel Buttons
Map the D-Pad and Analog Stick Correctly
Always map the physical D-pad as a D-pad and the left analog stick as an analog stick.
For older consoles that originally used only a D-pad, you can allow the analog stick to duplicate directional input by setting:
Analog to Digital Type → Left Analog
This gives you the option of using either input method without destroying the original controller layout.
Step 13: Save Controls Separately for Every Console
Now we finally use Content Directory Overrides.
Launch a game from the system you want to configure, open RetroArch, and map the buttons under:
Input → RetroPad Binds → Port 1 Controls
When everything feels right, save it through:
Quick Menu → Overrides → Save Content Directory Overrides
Repeat the process for each console.
This is much cleaner than forcing one universal button configuration onto machines that originally used completely different controllers.
Step 14: Fix Scaling for Older Handhelds
A Game Boy game blown up across a huge modern monitor can look ridiculous. Sometimes bigger is definitely not better.
If you want to control how much of the display an older system occupies, load a game and go to the video scaling options.
Set the aspect ratio to:
Custom
You can then adjust the X/Y position along with width and height until the game occupies a comfortable portion of your monitor.
Game Boy Color can be displayed according to your preferred 4:3 or 10:9 presentation, while Game Boy Advance uses its wider 3:2 aspect ratio.
Once satisfied, save the setup as a Content Directory Override so it applies only to that system.
Step 15: Add Shaders Without Going Crazy
Shaders are one of RetroArch’s deepest rabbit holes. You can spend hours trying to recreate CRTs, LCD grids, handheld displays, scanlines, phosphor glow, and practically every display imperfection ever invented.
You do not need to.
For a simple example, load a Game Boy or Game Boy Color game and open:
Quick Menu → Shaders
Turn Video Shaders on, then enable Remember Last Used Shader Directory.
The source guide recommends:
shaders_slang → interpolation → quilez.slangp
Apply the shader and save it through:
Manage Presets → Save Content Directory Preset
Then save the Content Directory Override as well.
Now every game in that particular system directory can use the same visual treatment without affecting unrelated consoles.
Step 16: Optional Turbo Buttons
Turbo can be especially useful for arcade shooters and other games built around constant rapid-fire input.
Under:
Quick Menu → Controls → Turbo Fire
the source setup uses:
- Turbo Fire: On
- Turbo Mode: Classic (Toggle)
- Turbo Bind: L Shoulder
- Turbo Period: 3
- Turbo Duty Cycle: 2
After setting it up, save a Game Remap File. This is ideal if you only need turbo in a handful of specific games rather than throughout an entire console library.
A Note About RetroArch Cheats
For this particular setup, I recommend leaving RetroArch’s cheat system alone unless you specifically need it. Cheat configurations can become messy, especially when old files keep loading again after you think you have disabled them.
If you previously created cheat files and want a completely clean setup, check RetroArch’s cheats directory and remove the unwanted files before rebuilding any affected game-specific settings.
Step 17: Finish Everything in ES-DE
RetroArch is now configured. The final step is making sure ES-DE launches the appropriate emulator for each system.
Start ES-DE and press Start on your controller to open its main menu.
Navigate to:
Other Settings → Alternative Emulators
This menu lets you choose the emulator or RetroArch core used by each system.
For example, if you want SNES games to use the RetroArch Snes9x core, choose:
Snes9x
rather than:
Snes9x (Standalone)
For Game Boy and Game Boy Color, you might select Gambatte.
Mix RetroArch and Standalone Emulators
You do not have to force every system through RetroArch. ES-DE’s real strength is that the frontend can hide the fact that different systems are using completely different emulators underneath.
Useful standalone choices can include:
- DuckStation — PlayStation
- PCSX2 — PlayStation 2
- Dolphin — GameCube and Wii
- melonDS — Nintendo DS
- Simple64 — Nintendo 64
- Cemu — Wii U
- Azahar — Nintendo 3DS
- Vita3K — PlayStation Vita
Choose the standalone entry for those systems inside ES-DE’s Alternative Emulators menu.
When everything is assigned, close ES-DE and launch it again.
Step 18: Make ES-DE Feel Like Your Own Console
If everything has been configured correctly, selecting a game in ES-DE should now launch it with the emulator you assigned. Your RetroArch controller shortcuts should work automatically, and Select + Start should exit RetroArch games cleanly and return you to the frontend.
At this point the technical work is basically finished. The remaining ES-DE settings are mostly about making the frontend pleasant to use.
One clean configuration is:
- Use the Iconic theme.
- Set the theme variant to Textlist.
- Use the Classic – Dark color scheme.
- Enable the automatic Favorites collection.
- Enable the automatic Last Played collection.
- Set Favorites as the system shown at startup.
- Set the startup view to Gamelist.
- Sort systems by Manufacturer, Release Year.
- Disable unwanted System Status information.
- Disable Sort Favorites Above Non-Favorites if you want a cleaner alphabetical list.
- Enable star markings for favorite games.
From there, adding or removing favorites becomes incredibly quick. On an Xbox-style controller, you can use Y to favorite or unfavorite a game.
The Finished RetroArch + ES-DE Setup
Once this is done, RetroArch largely disappears into the background — which is exactly where it should be.
You launch ES-DE, pick a system, choose a game, and play. Game Boy can use its own display settings and controls. Genesis can have a completely different button layout. Dreamcast can use a different core. PlayStation can launch through DuckStation. PlayStation 2 can jump straight into PCSX2. Yet from the couch, all of it still feels like one unified gaming system.
That is the real advantage of combining RetroArch with ES-DE. RetroArch gives you an enormous emulation toolbox, while ES-DE turns that toolbox into something you can actually enjoy browsing.
Take the time to organize the folders correctly, finish your global RetroArch configuration before creating console-specific overrides, and back up the completed ES-DE directory once everything works. Do that, and you will have a portable emulation setup that is far easier to maintain than a desktop full of unrelated emulator installations.
More importantly, once you finish configuring it, stop tweaking it for a while and actually play some games.