 Retro Replay Retro Gaming History, Reviews & Emulation

Eden Emulator Setup Guide 2026: How to Install Keys, Firmware and Games
Getting Eden Emulator running is fairly straightforward, but installing the emulator itself is only the beginning. Before Eden can properly recognize and launch your Nintendo Switch game backups, it needs several pieces of system data that are intentionally not bundled with the emulator. That includes your Nintendo Switch decryption keys and firmware, both of which should be dumped from hardware you own.
In this complete Eden Emulator setup guide for 2026, we will walk through the process from the beginning: installing Eden, checking for updates, installing your decryption keys, adding Nintendo Switch firmware, creating a game directory and enabling subfolder scanning. If you want information about Eden itself, including future releases, downloads, compatibility coverage and additional tutorials, visit our permanent Eden Emulator hub.
Important: Retro Replay does not provide Nintendo Switch firmware, encryption keys or copyrighted game downloads. Your keys, firmware and game backups should come from hardware and software that you legally own.
What You Need to Set Up Eden Emulator
Before configuring Eden, it is worth gathering everything you need in one place. This avoids one of the most common problems with emulator setup: getting halfway through the process and discovering that an important system file is missing.
- Eden Emulator for your operating system
- prod.keys and, where applicable, title.keys dumped from your own Nintendo Switch
- Nintendo Switch firmware dumped from your own console
- Legally dumped Nintendo Switch games
- A dedicated folder where you want to store your game library
Eden does not bundle the Nintendo-owned files required to decrypt Switch software. The original setup process therefore expects you to supply your own keys and firmware before attempting to launch games.
1. Download and Install Eden Emulator
Start by downloading the current Eden release from the emulator’s official distribution source. Choose the version intended for your operating system and extract the downloaded archive into a permanent location on your computer.
On Windows, something simple such as C:\Emulators\Eden\ works well. Avoid leaving Eden buried inside your Downloads folder or attempting to run it directly from a compressed archive. Once the files are extracted, launch the Eden executable and allow the main interface to open.
At this stage, an empty game library is completely normal. We still need to configure Eden before filling that library.
2. Check Eden for Updates
Eden is an actively developed emulator, which means new versions can introduce compatibility fixes, performance improvements and other changes. Before spending time troubleshooting an issue, make sure you are actually running a current build.
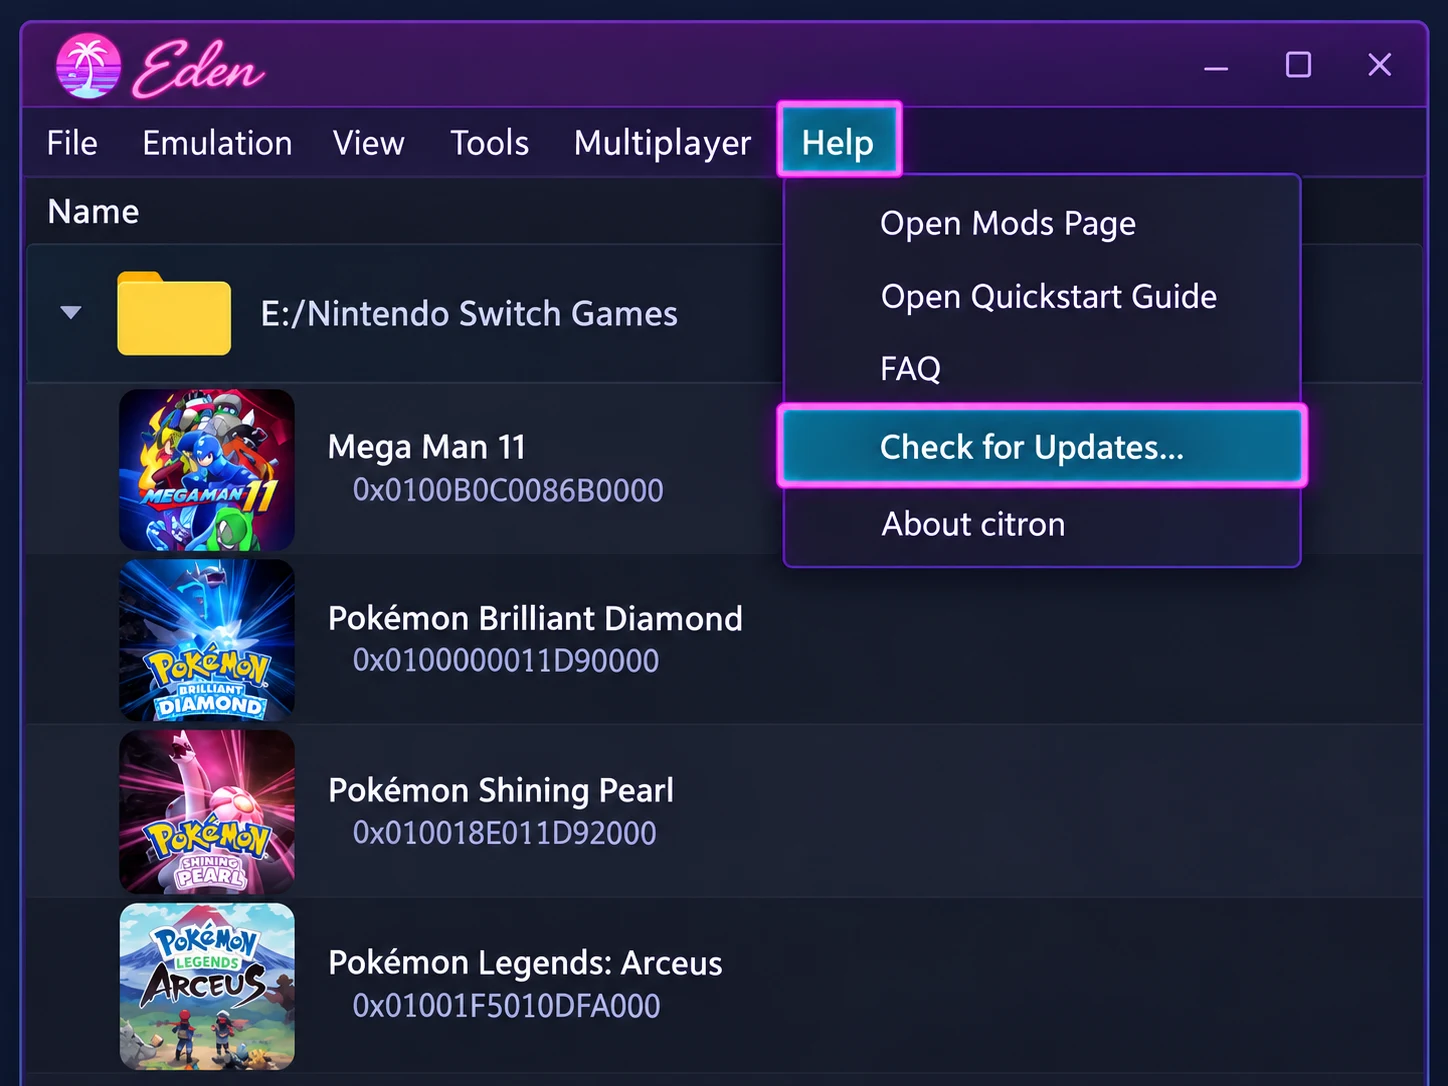
From the Eden menu bar, click Help and choose Check for Updates. If an update is available, follow Eden’s prompts and restart the emulator afterward. The original setup documentation recommends keeping Eden current because outdated versions may contain bugs or lack features found in newer builds.
Retro Replay will also continue covering major Eden releases separately. You can read our coverage of Eden version 0.2.1 and find our growing collection of Eden information through the Eden Emulator hub.
3. Install Your Nintendo Switch Decryption Keys
Before Eden can properly interpret encrypted Nintendo Switch game data, it needs the appropriate decryption keys. These commonly include files such as prod.keys and title.keys. Eden does not include these files, so they need to come from your own Nintendo Switch.

Open Eden and select Tools → Install Decryption Keys. Browse to the location where you stored your dumped key files and select them when prompted. The files should be extracted normally rather than left inside a ZIP or another compressed archive.
Keys can become especially important after updating your console firmware. If Eden begins reporting decryption errors after you change firmware versions, check that the keys you dumped correspond to the firmware installed in the emulator.
4. Install Nintendo Switch Firmware in Eden
The next piece of the setup is the Nintendo Switch firmware. Firmware contains system components that games may expect to find when they start, and the original Eden setup instructions note that games can fail to boot when the necessary firmware is not installed.
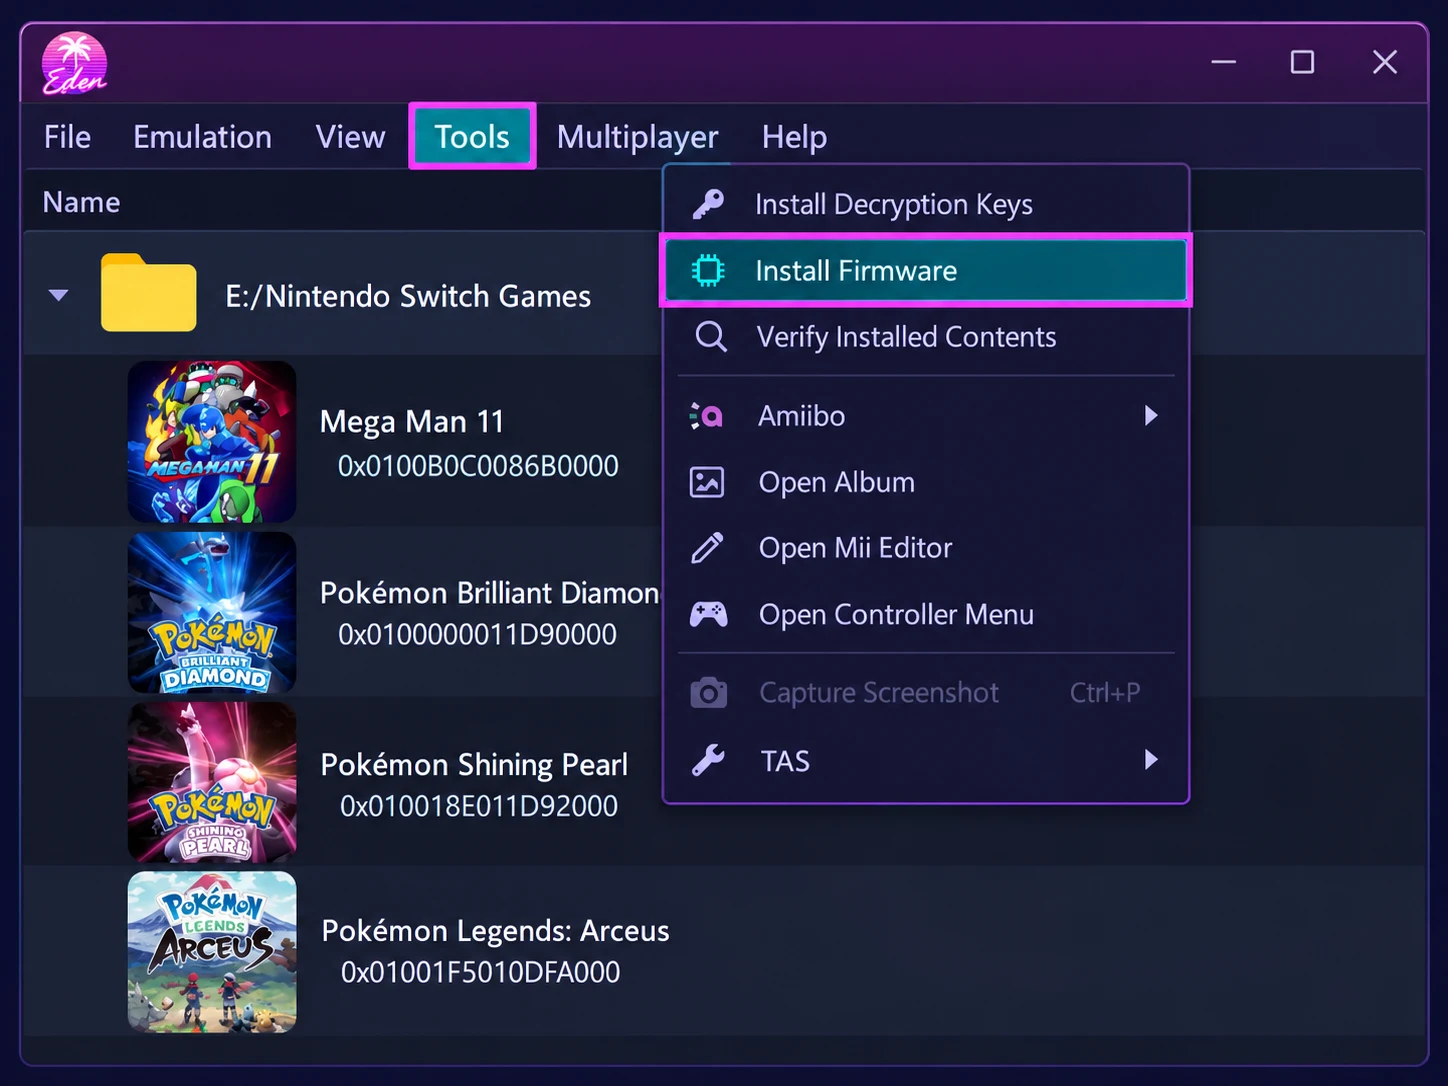
From Eden’s main window, click Tools and then Install Firmware. Navigate to the firmware files you dumped from your Nintendo Switch and allow Eden to install them.
Keeping firmware and decryption keys reasonably synchronized is important. If you install a newer firmware version while continuing to use incompatible or outdated keys, you can encounter boot failures or other errors that may initially look like an emulator compatibility problem.
5. Add Your Nintendo Switch Game Directory
Once Eden has its keys and firmware, you can begin building the game library. Rather than manually browsing to a game every time you want to play, Eden allows you to designate one or more directories containing your Nintendo Switch game backups.
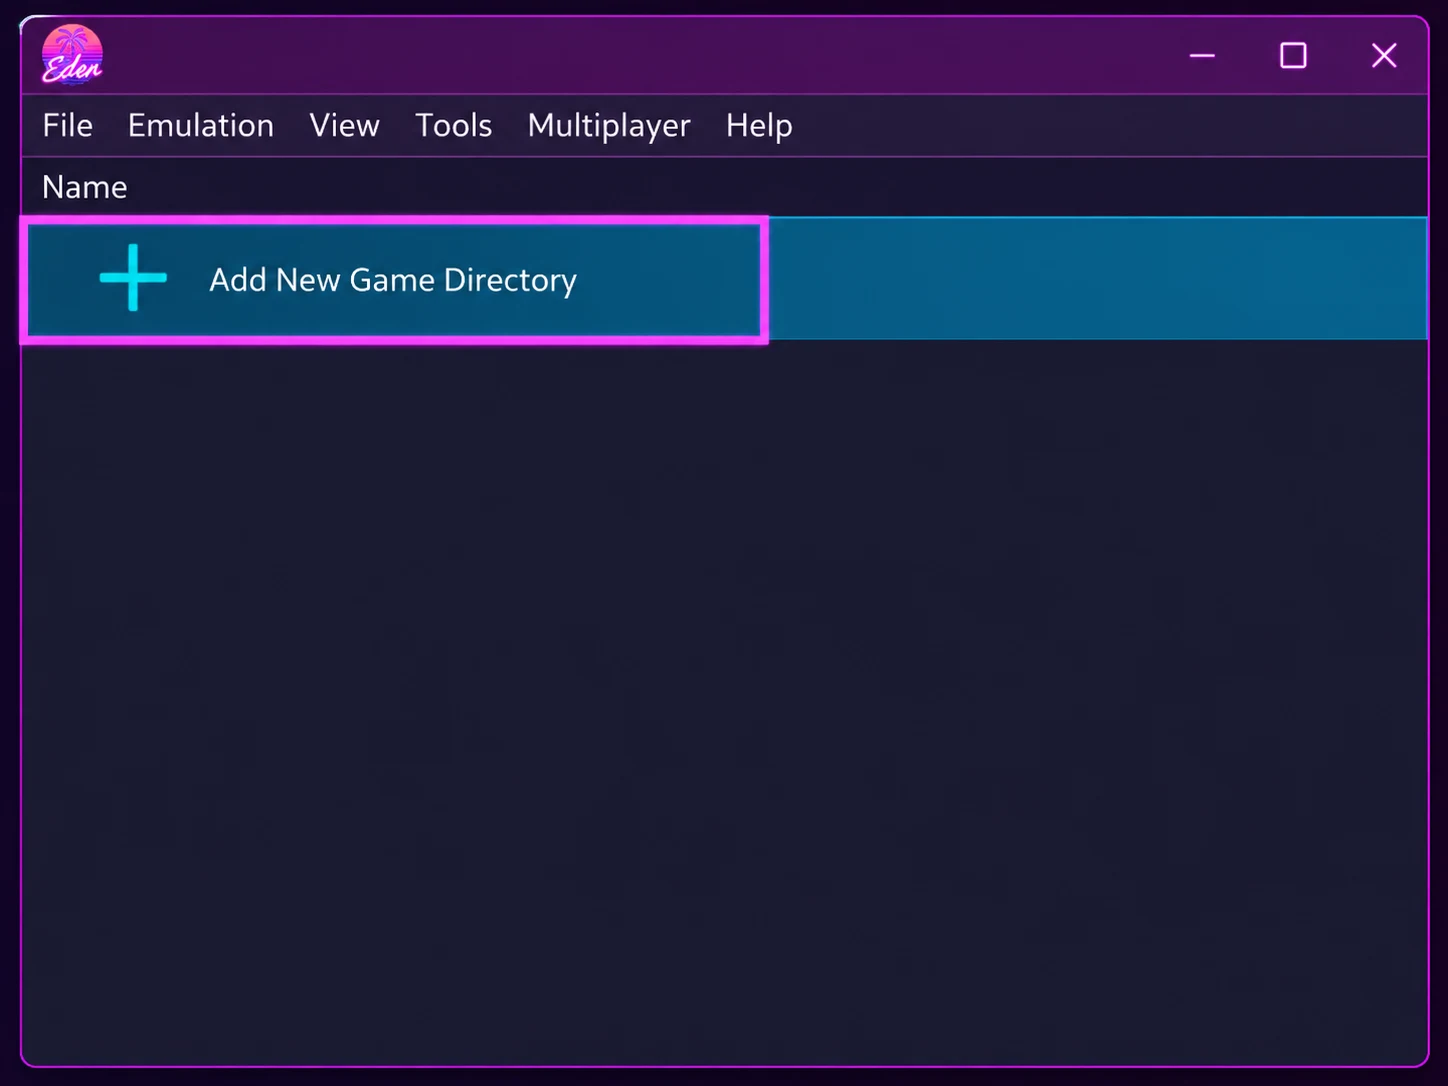
Click Add New Game Directory from Eden’s main window. Browse to the folder where you keep your legally dumped games and select it. Eden will scan the directory and display supported titles in the main game list. This follows the same basic directory process outlined in the original setup tutorial.
It can be helpful to create one clearly named parent directory such as D:\Nintendo Switch Games\ or E:\Switch Games\. That keeps your emulator configuration separate from the actual game library and makes it easier to move Eden itself later without reorganizing all of your game files.
6. Enable Scan Subfolders
If all of your games sit directly inside one directory, Eden may recognize them immediately. Many people, however, organize each title inside its own folder. In that situation, Eden needs permission to search beneath the main directory you selected.
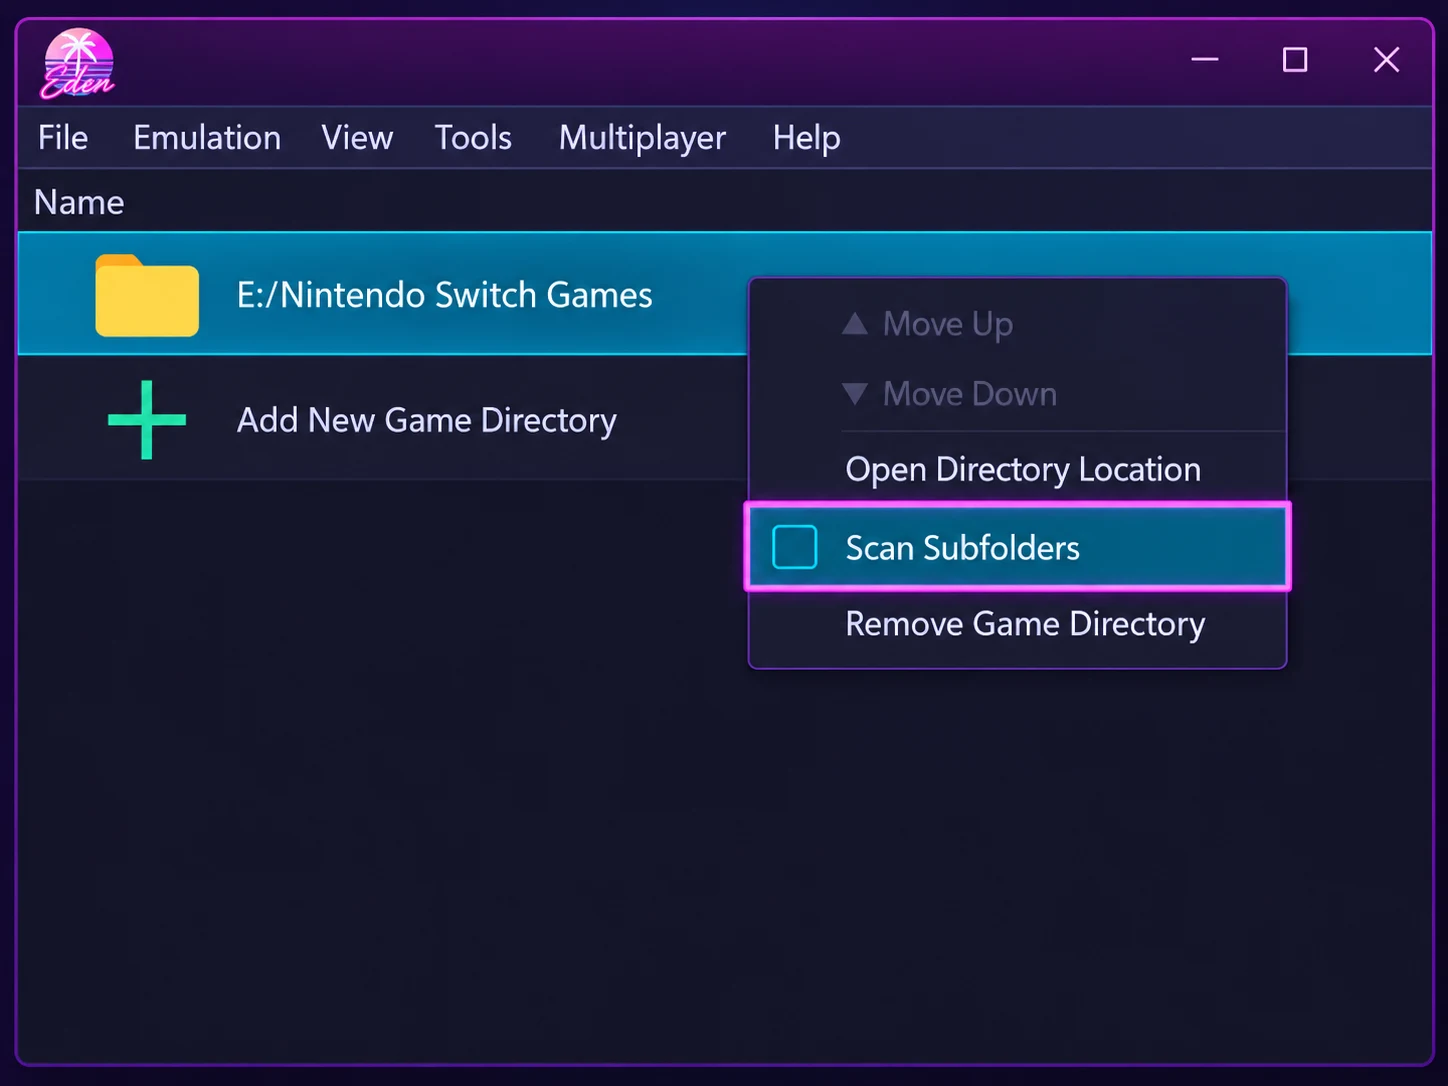
Right-click the game directory in Eden and select Scan Subfolders. Eden will then inspect directories located beneath the main game folder rather than checking only its top level. The original guide specifically recommends enabling this setting when games are stored inside subfolders.
After enabling the option, refresh Eden’s library if necessary. Your additional games should begin appearing in the main window as Eden discovers them.
7. Adding Game Updates and DLC
Once the base library is working, you can begin managing updates and downloadable content that you have legally dumped. The original Eden instructions note that downloadable content and game updates can be managed through the emulator and recommend refreshing the game list after adding or removing content.
If an update does not appear to work with a particular game, double-check that the update actually belongs to the same game and region. It is generally better to verify your files first rather than immediately changing graphics settings or assuming Eden itself is broken.
8. What to Do if Your Games Do Not Appear in Eden
If your game library remains empty after adding a directory, start with the simple possibilities. Confirm that Eden is pointed at the correct folder, then make sure Scan Subfolders is enabled if your games are stored inside individual directories.
After that, verify that your decryption keys and firmware were imported successfully. If a title appears but refuses to boot, confirm that the firmware and keys are appropriate for the software you are trying to run. Finally, check for a newer Eden release before spending too much time troubleshooting an issue that may already have been addressed by the developers.
Eden Emulator Setup Checklist
- Download and extract Eden Emulator.
- Launch Eden and check for updates.
- Install your Nintendo Switch decryption keys.
- Install firmware dumped from your Nintendo Switch.
- Add your Nintendo Switch game directory.
- Enable Scan Subfolders if your library uses individual game folders.
- Refresh Eden and verify that your games appear.
Where to Go Next With Eden
Once Eden recognizes your games and the basic setup is complete, you can begin experimenting with controller configuration, graphics options, performance settings and game-specific tweaks. Those subjects deserve their own guides because the best settings can vary considerably depending on your PC hardware and the game you are attempting to run.
Retro Replay is building a permanent resource for the emulator at our Eden Emulator hub. That page will connect Eden releases, setup guides, troubleshooting articles and other coverage in one location as development continues.